Capturing Single Name CDS Trades
This document describes how to capture single name CDS trades using the Credit Default Swap worksheet.
In a Credit Default Swap, you buy or sell protection over credit events against a premium.
Choose Trade > Credit Derivatives > Credit Default Swap to open the Credit Default Swap worksheet, from Calypso Navigator or from the Trade Blotter.
By default, CDS trades are set as standard fixed coupon trades.
 See Capturing Fixed Coupon CDS Trades for details.
|
CDS Quick Reference
When you open a CDS worksheet, the Trade panel is selected by default. Entering Trade Details
Or you can enter the trade fields directly. They are described below. Note that the Trade Date is entered in the Details panel.
Saving a Trade
You can also hit F3 to save the current trade as a new trade, or choose Trade > Save As New. You can also hit F12 to save the trade using any action available in the workflow, or choose Trade > Save Action. You will be prompted to select an action. A description will appear in the title bar of the trade worksheet, a trade Id will be assigned to the trade, and the status of the trade will be modified according to the workflow configuration. Pricing a Trade
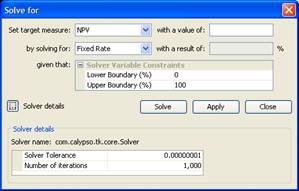
Select a target pricer measure and enter the target value. Then select the value to solve for (fixed rate, upfront fee, notional, or ISDA Spread) and click Solve. You can click Apply to set the value to solve for on the trade. Then click Price to obtain the target value. You can modify the solver variables and details as needed. Trade Lifecycle
|
1. Sample CDS Trade
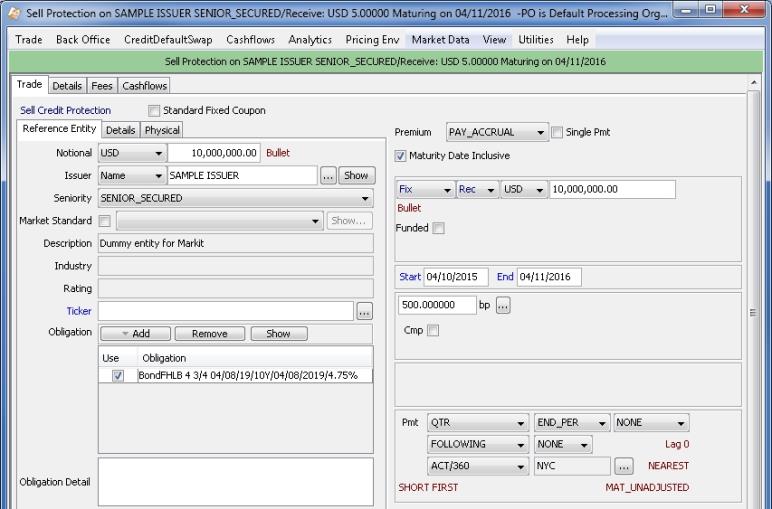
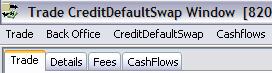
CDS Trade Window
2. Trade Panel - Field Description
Trade Details
|
Fields |
Description |
|---|---|
|
Role/Cpty |
The first two fields of the worksheet identify the trade counterparty. The first field identifies the trade counterparty’s role. The default role is specified using Utilities > Set Default Role. However, you can change it as applicable. You can select a legal entity of specified role from the second field, provided you have setup favorite counterparties. You can also type in a character to display the favorite counterparties that start with that character. Favorite counterparties are specified using Utilities > Configure Favorite Counterparties. Otherwise, click ... to select a legal entity of specified role from the Legal Entity Chooser. You can also type [Ctrl-F] to invoke the Legal Entity Chooser, or directly enter a Legal Entity short name |
|
Book |
Trading book to which the trade belongs. Defaults to the book selected in the User Defaults. You can modify as applicable. You can select a book, provided you have setup favorite books. Favorite books are specified using Utilities > Configure Favorite Books. Otherwise, click ... to select a book. The owner of the book (a processing organization) identifies your side of the trade. |
|
Id Ext Ref Int Ref |
Unique identification number of the trade. The trade Id is automatically assigned by the system when the trade is saved. You can load an existing trade by typing the trade Id into this field, and pressing [Enter]. You can also display the internal reference of external reference. The default trade reference to be displayed can be selected in the User Defaults. The internal reference and external reference can be set in the Details panel of the trade worksheet. |
|
Status |
Current status of the trade. The status is automatically assigned by the system based on the workflow configuration. The status will change over the lifetime of the trade according to the workflow configuration and the actions performed on the trade. |
|
Template |
You can select a template from the Template field to populate the worksheet with default values. Then modify the fields as applicable. |
|
Sell Credit Protection / Buy Credit Protection |
Direction of the trade from the book’s perspective. Double-click the Sell Credit Protection to switch to Buy Credit Protection as needed. |
Coupon Details
|
Fields |
Description |
|---|---|
|
Standard Fixed Coupon |
Check to capture a fixed coupon trade with ISDA 2009 conventions, or clear otherwise.
|
Reference Entity Panel
|
Fields |
Description |
||||||||||||||||||||||||
|---|---|---|---|---|---|---|---|---|---|---|---|---|---|---|---|---|---|---|---|---|---|---|---|---|---|
|
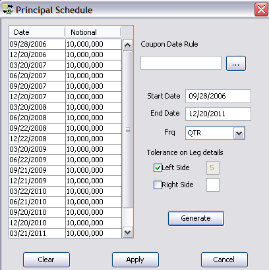
Notional |
Select the currency and enter the notional amount. Double-click the Bullet label if you want to specify an amortization schedule. Default is Bullet, no amortization. Select the Schedule amortization and click ... to define the schedule.
Or select the amortization frequency from the Frq field.
|
||||||||||||||||||||||||
|
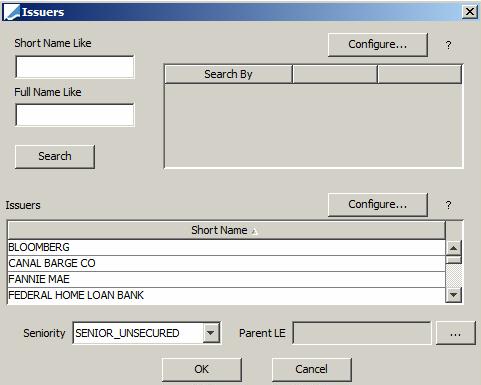
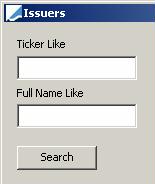
Issuer |
You can choose to select the issuer by Name or by Red Ticker.
The Issuer selection dialog appears as shown below.
You can click Configure in the issuers list to select the columns to be displayed. |
||||||||||||||||||||||||
|
Seniority |
Select the rating of the reference obligation. The corresponding reference obligation will appear if any. The reference obligation can be selected on the issuer (Ref Ob button in the Legal Entity window). Reference obligations are securities (normally corporate bonds) upon which the issuer maintains financial liability. Bonds are created using Calypso Navigator > Configuration > Fixed Income > Bond Product Definition. Specifying Default Seniority You can specify the default value for the Seniority field using either an environment property or a domain value. You can add the environment property CDS_SENIORITY along with a valid seniority value. Example: CDS_SENIORITY=SENIOR_SECURED Or you can add the domain cdsSeniority along with a valid seniority as the value. If multiple values exist in the cdsSeniority domain, the first entry will be used as the default value. If nothing is specified in neither the environment property nor the domain value, the default value of the Seniority field will be blank. |
||||||||||||||||||||||||
|
Market Standard |
Market Standard will be checked by default when you select an issuer (or issuer via ticker) that has a settlement matrix item configured. A read-only text box shows the name of the settlement matrix being used. When Market Standard is checked, items in the Details and settlement panels (Auction, Cash, and Physical) that come from the matrix are read-only. Clear this checkbox to capture a non-market-standard CDS. |
||||||||||||||||||||||||
|
Description |
Displays the full name of the selected issuer. |
||||||||||||||||||||||||
|
Industry |
Displays the industry of the selected issuer. The industry is defined in the issuer’s attribute INDUSTRY. |
||||||||||||||||||||||||
|
Rating |
Displays the credit rating of the issuer. Credit ratings can be defined on the issuer (Ratings button in the Legal Entity window). |
||||||||||||||||||||||||
|
Ticker |
A ticker is a set of trade attributes that allows associating credit curves with trades: currency, issuer, seniority and reference obligation. So each time you have a combination of currency, issuer, seniority and reference obligation, you can select a ticker rather than each attribute individually. This is optional. Click Select to select a ticker. You can create tickers from the Credit Market Data window, and from the credit curves windows. |
||||||||||||||||||||||||
|
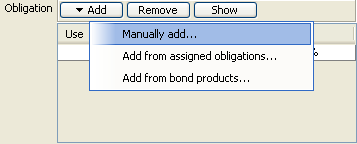
Obligation |
If the reference obligation is not defined on the issuer, you can select it here. Guarantor will be the reference entity.
Click Add to select the option to add the reference obligation. If you select Manually add, a window appears to add the identification String and you can enter the string and click Add button.
If you select Add from assigned obligation, the bonds from the same issuer appear in the grid and you can use one of them. If you select Add from bond products, product chooser window appears and you can select the desired bond. You can click Remove to remove the obligation. You can click Show to display the details of the select product. |
||||||||||||||||||||||||
|
Obligation Detail |
You can enter the details about the Obligation. |


Details Panel
|
Fields |
Description |
||||||||||||
|---|---|---|---|---|---|---|---|---|---|---|---|---|---|
|
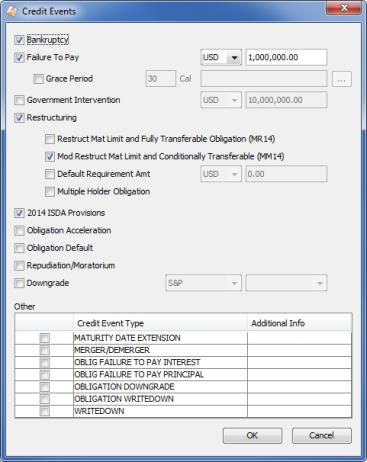
Credit Events |
Ⓘ [NOTE: For CDS Nth Default trades and CDS Nth Loss trades, the credit events are specified at the basket level] Click ... to select credit events. It brings up the Credit Events window.
If you do not see a credit event type, add it to the domain creditEventType. |
||||||||||||
|
Obligation Category |
Select the obligation category. |
||||||||||||
|
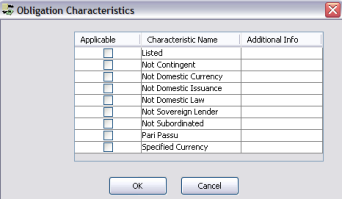
Characteristics |
Click ... to define the details of the obligation category. It brings up the Obligation Characteristics window.
If you check “Specified Currency”, you can select Standard, or a given currency.
|
||||||||||||
|
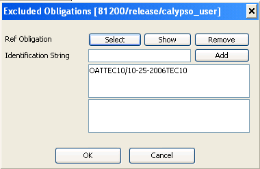
Excluded Oblig |
Click ... to select any obligations to be excluded.
|
||||||||||||
|
Additional Provisions |
Click ... to select additional settlement provisions. Additional provisions are defined in the domain cdsAdditionalProvisions. |
||||||||||||
|
Conv Oblig Supplement |
Check to specify that the ISDA Convertible Obligation Supplement is applicable to this trade. |
||||||||||||
|
Dispute Resolution |
Check to specify that Dispute Resolution is applicable to this trade. |
||||||||||||
|
Successor and Credit Event Supplement |
Check to specify that the ISDA Successor and Credit Event Supplement are applicable to this trade. |
||||||||||||
|
Monoline Supplement |
Check this box to indicate that a monoline supplement is applicable. |
||||||||||||
|
Restructuring Supplement |
Check to specify that the ISDA Restructuring supplement is applicable to this trade. |
||||||||||||
|
All Guarantees |
The trade refers to all Guarantees and not a specific guarantee. |
||||||||||||
|
Calc Agent |
Click ... to select a calculation agent. The calculation agent is a legal entity of role Calc_Agent. It is used for DTCC integration. |
||||||||||||
|
City |
Select the city of the calculation agent. Calculation agent cities are defined in the domain calcAgentCityCode. |
||||||||||||
|
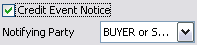
Credit Event Notice |
Check to specify the notifying party.
|
||||||||||||
|
ISDA |
Select the year of ISDA standards in effect. |
||||||||||||
|
Notice of Publicly available information applicable |
Check to specify public sources and number. 
|
||||||||||||
|
Settlement |
Select the settlement method: CASH, CUSTOMER_OPTION, or PHYSICAL.
See Settlement Details below. |
||||||||||||
|
Hol |
Click ... to select payment holiday calendars. |
||||||||||||
|
Termination Pmt |
Select INITIAL_MINUS_RECOVERY and enter a reference price.
Or select PAR_MINUS_RECOVERY. |
||||||||||||
|
AT_DEFAULT AT_MATURUTY |
Select whether the settlement is done when a default occurs (AT_DEFAULT) or at maturity (AT_MATURITY). If you select AT_DEFAULT, double-click the Settle Lag Desc label to switch to Settle Lag as applicable. Settle Lag Desc
Settle Lag
|
||||||||||||
|
Cap on Settlement |
Only appears for PHYSICAL and CUSTOMER_OPTION. Check to specify the number of days within which the settlement has to be done.
|
||||||||||||
|
Financing Rate |
Enter the financing rate of the settlement lag. |


Settlement Details
Settlement details depend on the selected Settlement Type in the Details panel.
| • | AUCTION - The Auction panel is displayed |
| • | CASH - The Cash panel is displayed |
| • | CUSTOMER_OPTION - The Cash panel and the Physical panel are displayed |
| • | PHYSICAL - The Physical panel is displayed |
Premium Details
See Premium Details.