Access Permissions Window
The Calypso system provides the ability to specify and enforce user permissions by user group. Every user is a member of one or more groups, and each group has access to:
| • | A given set of individual application functions that can be executed (functions like save, delete and remove in most windows, and more) |
| • | A given set of data (like books, filters, market data, and more) |
In addition, trading books can be restricted by currency and product type, and the actions that the users can carry out throughout the life of the trades can be restricted by product type.
This section describes how to setup groups, users, and associated permissions.
Note that users will need to get permission from the administrator of the system to read and modify access permissions when the Access Permissions mode is enabled.
1. Configuring Access Permissions
Access permissions are specified using the Access Permissions window.
From the Calypso Navigator, choose (menu action refdata.AccessPermissionWindow) to invoke the Access Permissions window.
![]()
Access Permissions Window
| » | Click Load to load access permission data if they are not already loaded. |
You can also click Load to refresh access permission data.
| » | To specify access permissions: |
| – | Create a group using the Groups panel and, if enabled, in Microsoft Active Directory. The Groups panel is selected by default. |
 See Specifying Groups for details.
| – | Select the Users panel to specify the users that belong to a given group. If Active Directory support is enabled, use Active Directory to specify users and establish User/Group relationships. |
See Specifying Users Using Calypso and Specifying Users Using MS Active Directory for details.
| – | Select the Group Access panel to associate permissions with a given group. |
See Specifying Group Permissions for details.
| – | Select the Book Access panel to specify restrictions on the books. |
See Specifying Book Permissions for details.
| – | Select the Workflow Access panel to specify restrictions on the actions that the users can carry out throughout the life of the trades. |
See Specifying Workflow Permissions for details.
| » | Click Save to save your changes, then click Close to close the Access Permissions window. |
Note that some panels have their own Save button. So click the local Save button where available to save local changes. When you are done with all the local changes, click the general Save button at the bottom of the window.
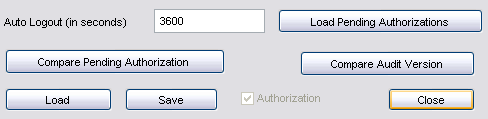
Auto Logout
You can enter a number of seconds in the "Auto Logout (in seconds)" field, after which a user session will be automatically ended if it is inactive, and provided there are no pending changes to be saved. Enter 0 to disable the auto logout capability.
Authorization Mode
When running Access Permissions in Authorization mode, the Authorization checkbox will appear checked and grayed out. Any modifications must be authorized by an Authorization User. An Authorization User is a user who has permission to authorize modifications, and who is different from the user who actually made the modifications.
To run Access Permissions in Authorization mode, you must add UserAccessPermission to the classAuthMode domain from the Calypso Navigator using Configuration > System > Domain Values (menu action refdata.DomainValueWindow).
See Data Authorization documentation for additional information the Authorization mode.
The following commands apply when Access Permissions is running in Authorization mode.
| » | Click Load Pending Authorizations to load the list of changes to Access Permissions that are pending authorization as shown below: |
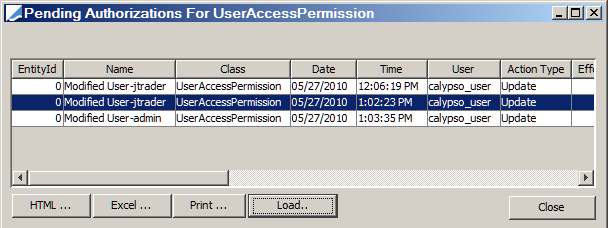
Click Close when you are done.
| » | Click Compare Pending Authorization to load the list of changes to Access Permissions that are pending authorization and compare with the previous version. |
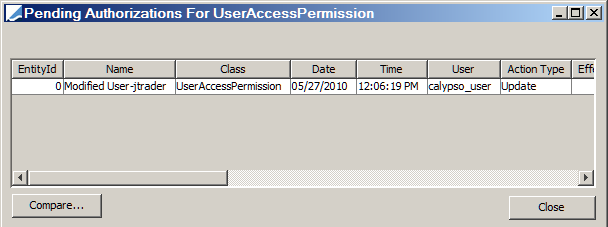
Select a row, then click Compare to display the differences with the previous version as shown below.

Click Close when you are done.
Audit Mode
The system runs in Audit mode by default.
See Data Auditing documentation for information the Audit mode.
The following command applies when Access Permissions is run in Audit mode.
| » | Click Compare Audit Version to bring up the Audit Report for Access Permissions as shown below. |
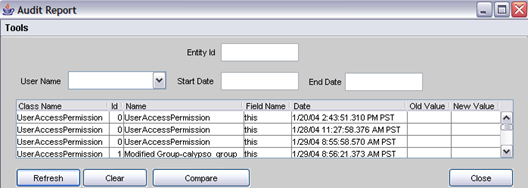
Enter selection criteria and click Refresh to load the corresponding audit records. Select a record and click Compare to display differences with the previous version as shown below.

Click Close when you are done.
2. Specifying Groups
Select the Groups panel to specify groups. A group is a collection of users that share common tasks, and therefore share common access permissions.
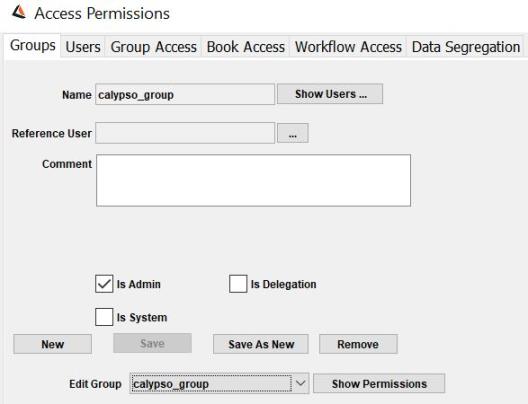
Select a group from the Edit Group field to load an existing group.
| » | Click New to create a new group. This will clear the Groups panel. Enter the fields as applicable. The fields are described below. |
| » | Then click the local Save button to save your changes. You will be prompted to enter a group name. If MS Active Directory is enabled, the Group name must match the function group specified in Active Directory to allow the Calypso system to function correctly. |
It is recommended to also click the general Save button before proceeding to another panel.
| » | Click Show Users to view the users associated with the group currently selected as shown below. |
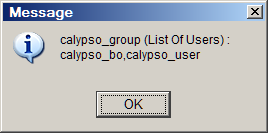
You can assign users to a group using the Users panel.
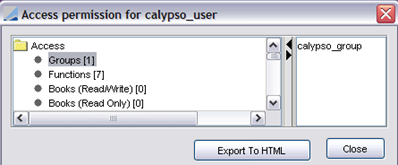
| » | Click Show Permissions to view the permissions associated with the group currently selected as shown below. |
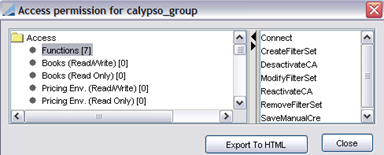
You can assign permissions to a group using the Group Access panel.
|
Field |
Description |
||||||||||||
|---|---|---|---|---|---|---|---|---|---|---|---|---|---|
|
Reference User |
Click the ... to select a reference user (optional). The reference user is used when copying the properties of a group to another group:
|
||||||||||||
|
Comment |
Enter a free-text comment (optional). |
||||||||||||
|
Filter Set |
No longer used. May produce undesired effects if used. This field will be removed from the application in a future release. |
||||||||||||
|
Read Only Filter Set |
No longer used. May produce undesired effects if used. This field will be removed from the application in a future release. |
||||||||||||
|
Is Admin |
Check the "Is Admin" checkbox to grant administrator privileges to the users of the group. You can also grant administrator privileges to a user by adding the user to the "admin" group. Note that the "admin" group does not need the "Is Admin" checkbox to be checked. |
||||||||||||
|
Is Delegation |
Check the "Is Delegation" checkbox to indicate that users from that group can delegate their access permissions to another user as needed. Ⓘ [NOTE: A delegated group cannot be a system group, and should not be an admin group] Access Permissions delegations can be configured using Configuration > User Access Control > Delegation Window.
|
||||||||||||
|
Is System |
Check the "Is System" checkbox to prevent recording login information for the users of that group. Note that other information will be audited. This should be used for groups where the users run servers and engines so that they do not get locked out. You can also use the environment properties ACCOUNT_LOGINS_NOT_AUDITED and DISABLE_LOGIN_AUDIT to achieve the same results. |
3. Specifying Users Using Calypso
Select the Users panel to create user login accounts that can access the Calypso system, and to assign users to groups.
Ⓘ [NOTE: To work with users when using MS Active Directory for authentication, refer to Specifying Users Using MS Active Directory. When using Active Directory, the User/Group relationship and User management functions are both controlled by Active Directory]
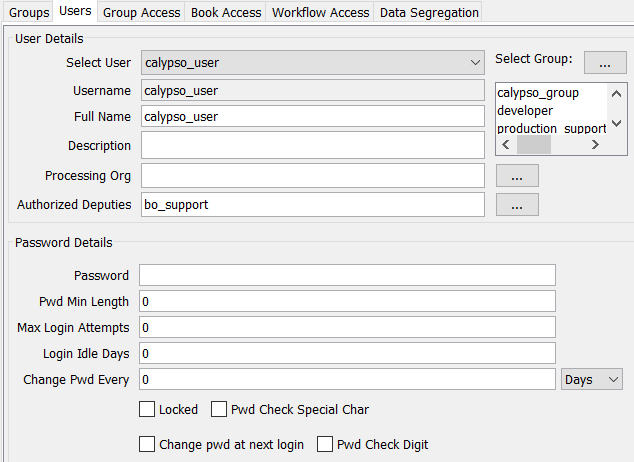
| » | Use the Select User drop down to choose an existing User to modify. |
| » | Click New to create a new user. This will clear the Users panel. Enter the fields as applicable. The fields are described below. |
| » | Click the Select Group button (...) to assign the user to one or more groups. You will be prompted to select groups. |
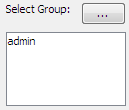
The selected groups will appear in the field below the Groups box (e.g., admin in the above example).
| » | Enter a Password in accordance with your organization's standards. |
| » | Enter the Minimum Password Length. |
| » | Enter the Maximum number of failed login attempts before the system locks out the User. |
| » | Login Idle Days displays the maximum number of number of days without a login before the system locks out the user. The system can lock the user in two ways: |
| – | Trigger by the user trying to login and already pass the idle days. |
| – | Configure the LOCK_INACTIVE_USERS scheduled task, which does not have any parameters, to run daily to lock the user passing the idle days. |
| » | Change Pwd Every specifies the interval in days or the number of logins between forced password changes. |
| » | Click Save to save your changes. You will be prompted to enter a user name. |
It is recommended to also click the Access Permission window's Save button at the bottom of the window before proceeding to another panel.
Ⓘ [NOTE: Calypso saves the user name to the database in lower case]
Additional available actions are described below.
|
Fields |
Description |
|---|---|
|
Full Name |
Enter the user's full name (mandatory). |
|
Enter a password for the user (mandatory). The user will be able to change the password after logging in.
|
|
|
Description |
Enter a free-text description of the user (optional). |
|
Processing Org |
Click the ... button next to the Processing Org field to select a set of processing organizations (optional). Use Shift+Click or Ctrl+Click to select multiple processing orgs. Ⓘ [NOTE: If the ModifyOnlyProcessingOrgTrade and ViewOnlyProcessingOrgTrade functions are granted, the user will only have access to the trades in the books associated with those processing orgs in Trade Report, Cash Flow Report, Account Enrichment, Trade Blotter and Trade Selector] Also, if the ModifyOnlyProcessingOrgStaticData and the ViewOnlyProcessingOrgStaticData functions are granted to the user's group, the user will only be able to view and modify static data of the processing organizations specified here. |
|
Authorized Deputies |
Select users to whom the user can delegate his or her access permissions as needed. The deputy must have access to the group defined with "Is Delegation" checked, and must have access to the Applications required to perform the actions (Navigator for example). Access Permissions delegations can be configured using Configuration > User Access Control > Delegation Window.
|
|
Enter the minimum length of the password (optional). You can also provide a custom password validation routine. Refer to the Calypso Developer's Guide for information on implementing a custom password validation routine. |
|
|
Enter a number and then select Days or Logins from the drop down selector to set the interval in days or number of logins that are permitted between forced password changes. You can also use the environment property MAX_SESSIONS_PER_APP_PER_USER to limit the number of times the users can login. |
|
|
Enter the maximum number of failed login attempts allowed before the user is automatically locked out (optional). Enter 0 for no limit. If the user reaches that maximum, the Locked checkbox will be checked automatically, and an administrator will have to unlock the user, so that the user can access the system again.
|
|
|
Enter the number of idle days allowed before the user is locked (optional). Enter 0 for no limit. If the user does not login for the specified number of days, the Locked checkbox will be checked automatically, and an administrator will have to unlock the user, so that the user can access the system again.
|
|
|
Last Login Date |
Last successful login date, retrieved from the user information. |
|
Number of failed attempts since the last successful login, retrieved from the user information. The number of failed attempts is only recorded when Max Login Att is set. |
|
|
Pwd Change Date |
Last date the password has been changed, retrieved from the user information. |
|
Check the Locked checkbox to prevent the user from accessing the system. The locking date will appear in the Locked Since field in the Status group.
This checkbox is automatically checked if the user reaches the maximum number of failed login attempts, or does not log in for the specified number of idle days. Ⓘ [NOTE: A user will not be automatically locked if the Access Permissions mode is not enabled] |
|
|
Change pwd at next login |
Select the "Change pwd at next login" checkbox to force the user to change his or her password at the next login. |
|
Select the "Pwd Check Digit" checkbox to force users to use at least one number character in their password. |
|
|
Pwd Check Special Char |
Select the "Pwd Check Special Char" checkbox to force users to use at least one special character (for example "?") in their password. |

Available Actions

| » | You can click Copy Config From to apply a number of configurations from a given user to the currently selected user. You will be prompted to select a user, then use the selector to choose the configuration(s) you wish to copy: |
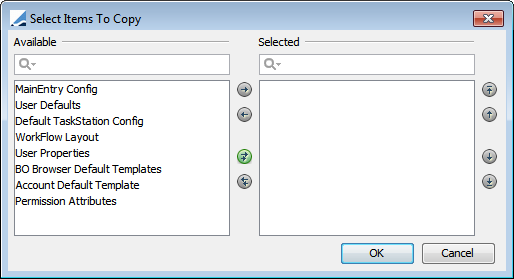
| – | MainEntry Config is no longer used. |
| – | User Defaults applies to default values for trade entry. |
| – | Default TaskStation Config applies to the Task Station. |
| – | Workflow Layout applies to the workflow graph configuration. |
| – | User Properties applies to the Users panel in Access Permissions. It allows setting default fields from another user. |
| – | BO Browser Default Templates applies to the BO Browser. |
| – | Account Default Template applies to the Account definition. |
| – | Permission Attributes applies to user attributes. |
| » | You can click Apply to Group to apply the current settings to all the users of a given group. You will be prompted to select a group. |
| » | You can click Permission Attributes to set User attributes. |
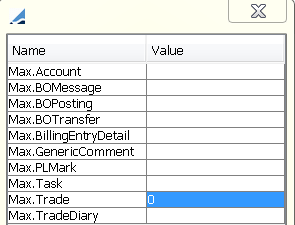
The following attributes can be set:
| – | Max.Account – The maximum number of Accounts to return. |
| – | Max.Balance - The maximum number of balance positions loaded by the Balance report and the Balance Activity report (default is 100000). |
| – | Max.BOAudit – The maximum number of BOAudit records to return. |
| – | Max.BOMessage – The maximum number of BO messages to return. |
| – | Max.BOPosting – The maximum number of BO postings to return. |
| – | Max.BOTransfer – The maximum number of BO transfers to load in Reports. |
| – | Max.BillingEntryDetail - The maximum number of billing details to load in Reports. |
| – | Max.GenericComment – The maximum number of generic comments to load in reports. |
| – | Max.InventoryPosition - The maximum number of inventory position to load in reports. |
| – | Max.OfficialPLMark – The maximum number of Official P&L Marks that can be loaded in the Official P&L Mark report. |
| – | Max.PLMark – The maximum number of P&L Marks that can be loaded in the PLMark report. |
| – | Max.PaymentSetup - The maximum number of Valid Payment configurations to be loaded in the Valid Payment Setup window. |
| – | Max.PendingModif - Used in Authorization Audit window. If the number of elements retrieved is greater than this limit, the process is stopped and an error is thrown. (This check is not in place for admin users.) |
| – | Max.ManualSdi – The maximum number of Manual SDIs that can be loaded in the Browse panel of the Manual SDI window and Cash Manual SDI window. |
| – | Max.Task – The maximum number of tasks to return. |
| – | Max.Trade – The maximum number of trades to return. |
| – | Max.TradeDiary – The maximum number of Trade Diary Records to return. |
| – | Max.TradeIdLoad - The maximum number of Trade IDs that can be loaded into memory. |
If an attribute is not available for selection, you can add it to the domain userAccessPermAttributes.
The domain UnVersionedCacheableObject contains Value = UserAccessPermissionSQL._cache. It allows refreshing the read-only data server cache in case any User attribute is modified.
| » | You can click Show Permissions to view the groups associated with the user currently selected as shown below. |
You can assign permissions to a group using the Group Access panel.
| » | You can click Remove to delete a user. Note that it will also delete all private templates associated with the user. |
3.1 Registering Users
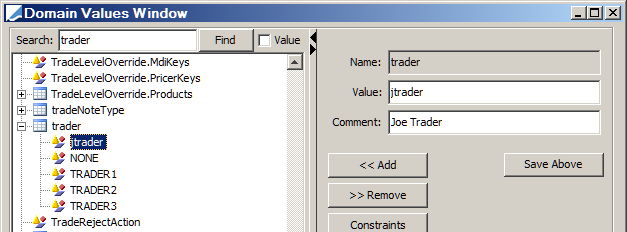
Trader
If a newly created user is a trader, you must add it to the trader domain using Calypso Navigator > Configuration > System > Domain Values (menu action refdata.DomainValueWindow).
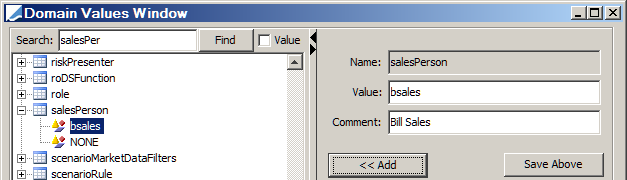
Sales Person
If a newly created user is a sales person, you must add it to the salesPerson domain using Calypso Navigator > Configuration > System > Domain Values (menu action refdata.DomainValueWindow).
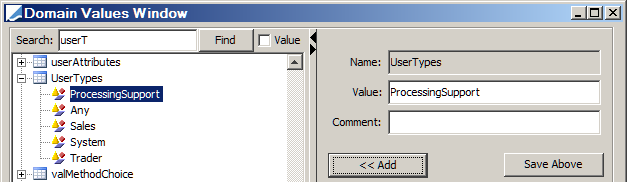
Other User Types
You can assign other user types to a given user using Calypso Navigator > Configuration > User Access Control > User Defaults (menu action refdata.UserDefaultsWindow). User types are retrieved from the UserTypes domain.
3.2 Resetting Login Info
A user can be locked (the Locked checkbox is checked) after one of the following actions, and only if the Access Permissions mode is enabled:
| • | Reaching the maximum number of failed login attempts |
| • | Reaching the number of idle days |
| • | Being locked by an administrator |
Only an administrator can unlock the user, so that the user can access the system again.
Do the following to unlock a user:
| » | Load the user and click Reset Login Info. |
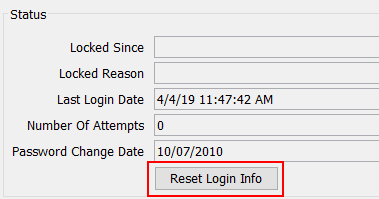
| » | Then click the local Save button to save the user, and click the general Save button at the bottom of the window. |
4. Specifying Users Using MS Active Directory
4.1 Overview
Calypso’s Microsoft Active Directory integration consists of two components. First, in order to configure access permissions, user identifiers must exist in Calypso. These can then be put into groups and Calypso specific access permissions can then be assigned. In order to import these users, a scheduled task has been provided which attempts to import both users and groups into Calypso’s database. This scheduled task can be repeated on a regular basis in order to synchronize users and groups as they are managed in MSAD. Once this access permission is configured, users then need to be authenticated against MSAD on login.
Note that any integration with an external identity system implies that management of that user is delegated to the external system expert.
When using MS Active Directory to manage user access to Calypso, the following changes occur:
| • | Because Active Directory manages a number of user functions, the comparable Calypso functionality is disabled. The following fields, checkboxes, and buttons are disabled: |
| – | Fields: Select Group, Password, Pwd Min Length, Change Pwd Every |
| – | Checkboxes: Pwd Check Special Char, Change pwd at next login, Pwd Check Digit |
| – | Buttons: New, Save As New, Remove |
| • | Administrators will insert, update, and delete user credentials using Active Directory, not the Users tab of the Access Permissions window. |
| • | Administrators manage the remaining user functions (manual locking, Permission Attributes, Apply to Group, Copy Config From, Processing Org, etc.) on the Users tab of the Access Permissions window. |
| • | Group names follow local Active Directory naming conventions. Group names specified in Calypso must exist in Active Directory. |
| • | Administrators will manage user/group relationships using Active Directory. |
| • | Audit Records are maintained using a user's domain/user_name. |
| • | Active Directory is used to authenticate Calypso logins. |
4.2 Enabling MS Active Directory Support in Calypso
If your site uses Microsoft Active Directory, you have the option to use the MSAD LDAP service to perform user authentication in Calypso.
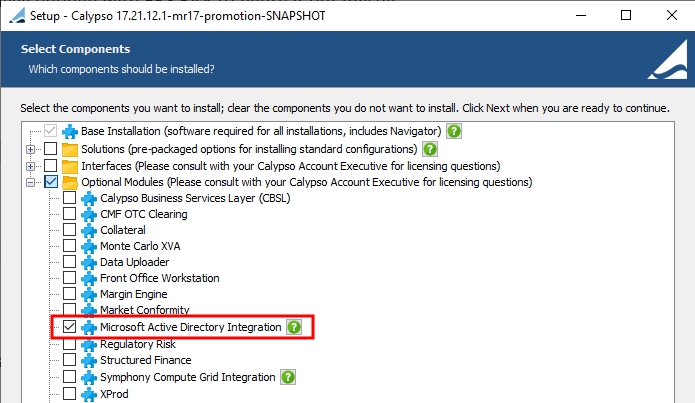
You can enable Active Directory support in Calypso by selecting the optional module "Microsoft Active Directory Integration" in the Calypso Installer.
Step 1 – Grant the Active Directory user access to the Admin page of the Data Server.
| » | Create a group called "AdmServer" in MSAD and add the user to it. |
Step 2 – Configure users and Calypso function groups in Microsoft Active Directory.
Step 3 – Remove all existing users from the Calypso database.
| » | Start Calypso without enabling MSAD. |
| » | Run the scheduled task SYNCLDAPUSER. It will remove all existing users from the database and populate the database with the users configured in MSAD (from Step 1). |
See Synchronizing the MS Active Directory for details on SYNCLDAPUSER scheduled task.
| » | Shut down Calypso. |
Step 4 – Define user names and passwords in Calypso.
| » | Set the environment properties as follows: |
| – | CLIENTUSER=<user name as defined in MSAD> |
| – | CLIENTPASSWD=<password defined for the user in MSAD> |
| – | AutoPrependDomain |
always – Always prepend the Windows domain to the user name typed (from Calypso Navigator login window) when running on Windows.
true – Prepend if necessary, i.e. when running on Windows and the username entered does not contain '\' ("ny_calypso\jsmith"), then prepend the domain name.
not set or any other value – Do not prepend.
Step 5 – Enable MSAD authentication.
| » | Modify the configuration file "resources/Core.DataServer.clientconfig.xml" as follows: |
| – | Add "enableMSAD" to the "depends–on" property in the DSConnection bean. |
| – | Uncomment the enableMSAD bean. |
Before:
<bean id="DSConnection" class="com.calypso.tk.service.DSConnection" lazy-init="true" init-method="init" destroy-method="stopSession" depends-on="ClientBeans">
<!--
<bean id="enableMSAD" class="com.calypso.security.auth.callback.CalypsoClientCallbackHandler">
<property name="msadEnabled" value="true" />
</bean>
-->
After:
<bean id="DSConnection" class="com.calypso.tk.service.DSConnection" lazy-init="true" init-method="init" destroy-method="stopSession" depends-on="enableMSAD,ClientBeans">
<bean id="enableMSAD" class="com.calypso.security.auth.callback.CalypsoClientCallbackHandler">
<property name="msadEnabled" value="true" />
</bean>
| » | Modify the configuration file "resources/appConfig/authserver.properties" as follows: |
Add:
calypso.ldap.enabled=true
calypso.ldap.parseusername=true
To restrict authentication to LDAP users only. add:
calypso.ldap.authflag.required=true
Ⓘ [NOTE: After making configuration changes, you must re-deploy your application servers using the Local Deployer or the DevOps Center. Please refer to the Calypso Installation Guide for details]
Step 6 – Replace Calypso security with MSAD security.
LDAP authentication is available out-of-the-box. The following environment properties should be set in the Environment:
| • | MSAD_URL=<LDAP hostname> |
| • | MSAD_BIND_DN=<username as defined in MSAD> |
| • | MSAD_BIND_CREDENTIAL=<password as defined for user in MSAD> |
| • | MSAD_BASE_CTX_DN=<cn=Users, dc=ny, dc=calypso, dc=com> |
| • | MSAD_SEARCH_FILTER=sAMAccountName={0} |
Ⓘ [NOTE: MSAD_BIND_CREDENTIAL can optionally be encrypted with key=MSAD_BIND_DN using Calypso Encryptor Launcher available with Calypso CLI]
See Command Line Instructions for details.
Step 7 – Re-start Calypso. MSAD is now used for user authentication.
4.3 Synchronizing MS Active Directory
It is recommended to run the scheduled task SYNCLDAPUSER on a regular basis to synchronize the MS Active Directory with Calypso users. Calypso recommends every 300 seconds.
The SYNCLDAPUSER scheduled task:
| • | Reads the group names from the property file "client/resources/sync_ldap_group_mapping.properties". |
It should contain rows with <Calypso group name>=<MSAD group name>
If this file does not exist, the MSAD group name must exist in Calypso.
| • | Reads the users from the same list of Calypso function groups created in MS Active Directory. Note that the group can be nested and users in the outer group are considered as belonging to the inner groups. |
| • | Updates the users and groups in the Calypso database. |
| • | Removes users that do not belong to any Calypso group. |
If necessary, the Administrator can immediately lock out a Calypso user using the "Lock" checkbox on the User Access tab of the Access Permissions window. Note that users locked via this method cannot be unlocked by the SYNCLDAPUSER scheduled task as it can only unlock users who have been locked by the SYNCLDAPUSER task.
Connection information for the Active Directory LDAP service is set up as scheduled task attributes.
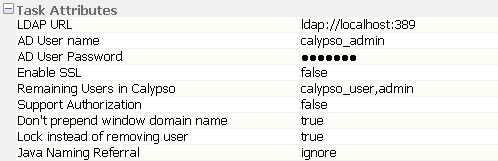
| • | LDAP URL – Host and port number of Active Directory LDAP URL. |
Example: ldap://msad_host:389
| • | AD User name – Administrator's Active Directory user name. |
| • | AD User Password – Administrator's Active Directory password. |
| • | Enable SSL – Is the LDAP over SSL enabled? Configuration is required to enable SSL. |
Please refer to Calypso Installation and Upgrade System Guide for details on configuring SSL.
| • | Remaining Users in Calypso – Comma separated list of any Calypso users not defined in Active Directory to NOT be deleted. Typically these are user templates and not actual Calypso users. |
| • | Support Authorization – When true, users added through SYNCLDAPUSER must have their changes authorized, if authentication is enabled in the Data Server. |
| • | Don’t prepend window domain name – When set to true, the system does not prepend the window domain name when syncing MSAD users to calypso users. Refer to Step 9 of SYNCLDAPUSER Logic, below. |
| • | Lock instead of removing user – When set to true, users who are no longer in MSAD are locked instead of being removed. |
| • | Java Naming Referral – The value passed to the "java.naming.referral" property. Set to follow to automatically follow any referrals. Set to ignore to ignore referrals. Set to throw to throw a ReferralException for each referral. Default is follow. Ignore should be used when updating referral entries, and/or if you receive “javax.naming.PartialResultException”. |
SYNCLDAPUSER Logic
The steps below describe how the SYNCLDAPUSER scheduled task fetches user/group information from Active Directory.
- Collect a list of group names defined in "client/resources/sync_ldap_group_mapping.properties" or in the Calypso database if the file does not exist.
- Use the LDAP URL to connect to Active Directory with baseDN as "" (i.e. connect to rootDSE).
- Once connected to the rootDSE, get the values of two attributes, defaultNamingContext and schemaNamingContext.
- With the schemaNamingContext attribute, construct groupSchemaDN by prefixing "CN=group," to the schemaNamingContext. All group objects defined in Active Directory will have their objectCategory attribute equal to groupSchemaDN.
- Construct userSchemaDN by prefixing "CN=Person," to the schemaNamingContext. All user objects defined in Active Directory will have their objectCategory attribute equal to userSchemaDN.
- Use the defaultNamingContext as the baseDN when fetching users or groups in Active Directory. Also, the sAMAccountName attribute on the user/group is used so make sure it is populated properly.
- Fetch all Active Directory groups (objectCategory = groupSchemaDN as described in Step 4) with the name attribute in the group list collected in Step 1.
- For each group fetched in Step 7, get its member attribute which contains a list of users/groups.
- Fetch all users included in the member attribute of the groups from Step 7 or sub-group from Step 8.
| – | Don't prepend window domain name = FALSE: The msDS-PrincipalName attribute is lower-cased and used as the username and displayName, and as the full_name in Calypso. |
| – | Don't prepend window domain name = TRUE: The sSAMAccout attribute is lower-cased and used as the username and displayName, and as the full_name in Calypso. |
Ⓘ [NOTE: "msDS-PrincipalName" is a constructed property and not all LDAP browsers support constructed properties. This property contains a value in the form of "NetBIOS domain name"\"sAMAccountName"]
4.4 Synchronizing a Single User from MS Active Directory
Rather than running SYNCLDAPUSER to synchronize all users, you can sync a single user on demand using a web service which takes xml input. You can do this using a tool such as SoapUI or Postman. It is described here using SoapUI.
The web service API is: public MSADResponseContext syncUser(MSADRequestContext)
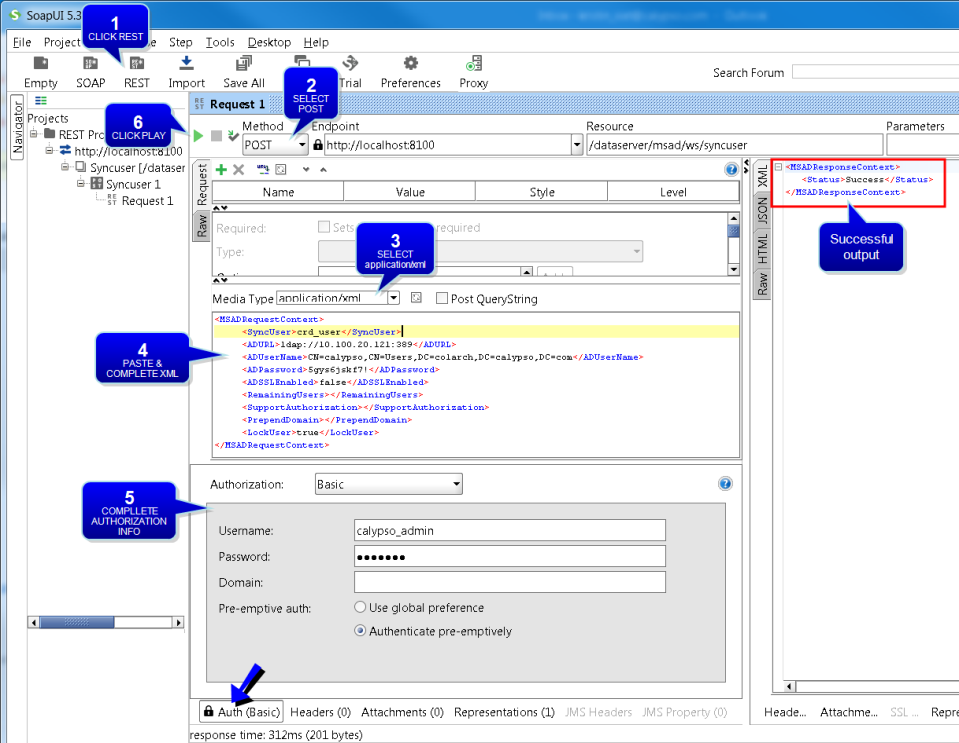
Step 1 – Click REST. You will be prompted to enter the web service URL.
Example: http://localhost:8100/dataserver/msad/ws/syncuser (where the port is the Data Server port)
Step 2 – Select POST as the method.
Step 3 – Select application/xml as the media type.
Step 4 – Paste the sample xml (given below), and complete the tags as needed. The conditional mandatory tags are only needed if they are not specified in the "calypsouser.properties" file.
| • | SyncUser – The user to be synchronized. Mandatory. |
| • | ADURL – Host and port number of Active Directory LDAP URL. Conditional mandatory. |
Example: ldap://msad_host:389
| • | ADUserName – Administrator's Active Directory user name. Conditional mandatory. |
| • | ADPassword – Administrator's Active Directory password. Conditional mandatory. |
| • | ADSSLEnabled – Is the LDAP over SSL enabled? Configuration is required to enable SSL. |
Please refer to Calypso Installation and Upgrade System Guide for details on configuring SSL.
| • | RemainingUsers – Comma separated list of any Calypso users not defined in Active Directory to NOT be deleted. Typically these are user templates and not actual Calypso users. |
| • | SupportAuthorization – When true, users added through the web service must have their changes authorized, if authentication is enabled in the Data Server. |
| • | PrependDomain – When set to true, the system prepends the window domain name when syncing MSAD users to calypso users. |
| – | PrependDomain = TRUE: The msDS-PrincipalName attribute is lower-cased and used as the username and displayName, and as the full_name in Calypso. |
| – | PrependDomain = FALSE: The sSAMAccout attribute is lower-cased and used as the username and displayName, and as the full_name in Calypso. |
Ⓘ [NOTE: "msDS-PrincipalName" is a constructed property and not all LDAP browsers support constructed properties. This property contains a value in the form of "NetBIOS domain name"\"sAMAccountName"]
| • | LockUser – When set to true, users who are no longer in MSAD are locked instead of being removed. |
Sample xml:
<MSADRequestContext>
<SyncUser></SyncUser>
<ADURL></ADURL>
<ADUserName></ADUserName>
<ADPassword></ADPassword>
<ADSSLEnabled></ADSSLEnabled>
<RemainingUsers></RemainingUsers>
<LockUser></LockUser>
<PrependDomain></PrependDomain>
<SupportAuthorization></SupportAuthorization>
</MSADRequestContext>
Step 5 – Select the Auth tab at the bottom. In the Authorization drop down, select Add New Authorization. You will be prompted to select the authorization type - Select Basic and click OK.
Step 6 – Click ![]() . You should see a successful status in the xml output area on the right side.
. You should see a successful status in the xml output area on the right side.
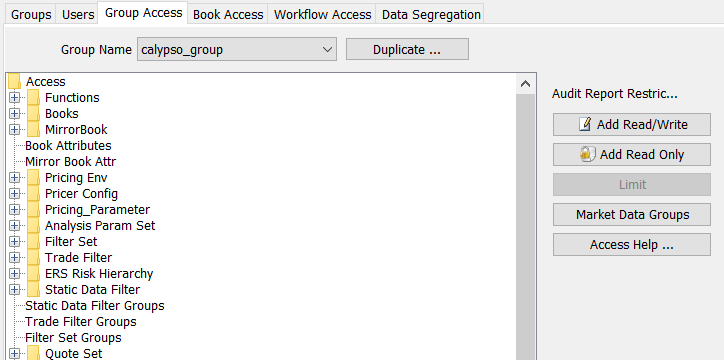
5. Specifying Group Permissions
Select the Group Access panel to specify group permissions.
A group of users can be granted permission to execute certain applications and individual functions, and can be granted to access certain data. For example, a group can be granted read/write access on a given book, but if the group does not have the ModifyBook function, the users of the group will not be able to modify the book.
Under the Access label, the Application Name and Functions entities allow granting permission to run applications and execute individual functions. The other entities allow granting access to data.
| » | Select a group from the Group Name field. |
| » | You can click Duplicate to copy the permissions of another group. You will be prompted to select a group. |
| » | Select an entity from the Access list. |
Once you have selected an entity, click Add Read/Write to add read/write permissions to certain data of that entity, and click Add Read Only to add read-only permissions to other data of that entity, as applicable.
You will be prompted to select data from the selected entity. The entities are described below.
Note that data that are not granted access will not appear in the environment of the user.
Once you have selected entity data, you can double-click the entity to view the associated data as shown below.
The lock icon identifies read-only data, and the pencil icon identifies read-write data.
| » | There is no local Save button, so it is recommended to click the general Save button before proceeding to another panel. |
| » | Click Access Help for information on the access permission requirements of each application. |
| » | Click Function Help for description of individual functions. |
| » | Note that the Limit button only applies to quotes sets. |
|
Entities |
Description |
|||
|---|---|---|---|---|
|
Allows granting permission for executing individual application functions. You can select _ALL_ to grant permission for executing all functions. Functions can only be granted read/write permission since it is the function itself that dictates what it controls.
|
||||
|
Books |
Allows granting read/write and read-only access to books. You can select _ANY_ to grant access to any book. Note that Book access is also controlled by the Processing Org field in the User panel, and the Book Access panel. Books that have read/write permission can be used to enter trades, and their definition can be modified in the Book window. Books that have read-only permission cannot be used to enter trades (the trades that belong to these books can only be viewed), and their definition cannot be modified. |
|||
|
MirrorBook |
Allows granting read/write and read-only access to books used as mirror books. You can select _ANY_ to grant access to any book. Note that Book access is also controlled by the Processing Org field in the Users panel, and the Book Access panel. Books that have read/write permission can be used to enter mirror trades, and their definition can be modified in the Book window. Books that have read-only permission cannot be used to enter mirror trades (the trades that belong to these books can only be viewed), and their definition cannot be modified. |
|||
|
Book Attributes |
Allows granting read/write and read-only access to books based on book attributes. Books for which the book attributes have read/write permission can be displayed and modified. Books for which the book attributes have read-only permission cannot be displayed and modified. Example: If the book attribute ABC exists with possible value "yes" and "no" then in the access permissions if you set the Book Attributes = "ABC.yes", you give the ability to this group of users to have access to all the books which have the book attribute ABC set to "yes". If a book has no value or value = "no" for the book attribute ABC then it doesn't belong to the allowed group of books. |
|||
|
Mirror Book Attr |
Allows granting read/write and read-only access to mirror book attributes. Mirror book attributes that have read/write permission can be displayed and modified. Mirror book attributes that have read-only permission cannot be displayed and modified. |
|||
|
Pricing Env |
Allows granting read/write and read-only access to pricing environments. You can select _ALL_ to grant access to all pricing environments. Pricing environments that have read/write permission can be used to price trades, and their definition can be modified in the Pricing Env window. Pricing environments that have read-only permission can be used to price trades, and their definition cannot be modified. |
|||
|
Pricer Config |
Allows granting read/write and read-only access to pricer configurations. You can select _ALL_ to grant access to all pricer configurations. Pricer configurations that have read/write permission can be used in pricing environments, and their definition can be modified in the Pricer Configuration window. Pricer configurations that have read-only permission can be used in pricing environments, and their definition cannot be modified. |
|||
|
Pricing_Parameter |
Allows granting read/write and read-only access to pricing parameter sets. You can select _ALL_ to grant access to all pricing parameter sets. Pricing parameter sets that have read/write permission can be used in pricing environments, and their definition can be modified in the Pricing Params window. Pricing parameter sets that have read-only permission can be used in pricing environments, and their definition cannot be modified. |
|||
|
Analysis Param Set |
Allows granting read/write and read-only access to analysis parameter sets. You can select _ALL_ to grant access to all analysis parameter sets. Analysis parameter sets that have read/write permission can be used to run risk reports, and their definition can be modified in the Analysis Param Viewer window / Analysis Designer window. Analysis parameter sets that have read-only permission can be used to run risk reports, and their definition cannot be modified. |
|||
|
Filter Set |
Allows granting read/write and read-only access to filter sets. You can select _ALL_ to grant access to all filter sets. Filter sets that have read/write permission can be used for loading trades, and their definition can be modified in the Filter Set window. Filter sets that have read-only permission can be used for loading trades, and their definition cannot be modified. |
|||
|
Trade Filter |
Allows granting read/write and read-only access to trade filters. You can select _ALL_ to grant access to all trade filters. Trade filters that have read/write permission can be used for loading trades, and their definition can be modified in the Trade Filter window. Trade filters that have read-only permission can be used for loading trades, and their definition cannot be modified. |
|||
|
Allows granting read/write and read-only access to static data filters. You can select _ALL_ to grant access to all static data filters. Static data filters that have read/write permission can be used for loading data, and their definition can be modified in the Static Data Filter window. Static data filters that have read-only permission can be used for loading data, and their definition cannot be modified. |
||||
|
Static Data Filter Groups |
Allows granting read/write and read-only access to static data filter groups. You can select _ALL_ to grant access to all static data filter groups. Static data filter groups that have read/write permission allow the corresponding static data filters to be used from the windows belonging to the groups, and the definition of the corresponding static data filters can be modified. Static data filter groups that have read-only permission allow the corresponding static data filters to be used from the windows belonging to the groups, and the definition of the corresponding static data filters cannot be modified. |
|||
|
Trade Filter Groups |
Allows granting read/write and read-only access to trade filter groups. You can select _ALL_ to grant access to all trade filter groups. Trade filter groups that have read/write permission allow the corresponding trade filters to be used for loading trades, and the definition of the corresponding trade filters can be modified. Trade filter groups that have read-only permission allow the corresponding trade filters to be used for loading trades, and the definition of the corresponding trade filters cannot be modified. |
|||
|
Filter Set Groups |
Allows granting read/write and read-only access to filter set groups. You can select _ALL_ to grant access to all filter set groups. Filter set groups that have read/write permission allow the corresponding filter sets to be used for loading trades, and the definition of the corresponding filter sets can be modified. Filter set groups that have read-only permission allow the corresponding filter sets to be used for loading trades, and the definition of the corresponding filter sets cannot be modified. |
|||
|
Quote Set |
Allows granting read/write and read-only access to quote sets. You can select _ALL_ to grant access to all quote sets. It is also possible to limit read/write access to subsets of quotes within a Quote Set.
Quote sets that have read/write permission can be used in pricing environments, and their definition can be modified in the Quote Set window. Quote sets that have read-only permission can be used in pricing environments, and their definition cannot be modified. |
|||
|
Risk Config |
Allows granting read/write and read-only access to risk configurations. You can select _ALL_ to grant access to all risk configurations. Risk configurations that have read/write permission can be used to run risk reports, and their definition can be modified in the Risk Analysis window. Risk configurations that have read-only permission can be used to run risk reports, and their definition cannot be modified. |
|||
|
Scheduled Task |
Allows granting read/write and read-only access to scheduled tasks. You can select _ALL_ to grant access to all scheduled tasks. Scheduled tasks that have read/write permission can be executed, and their definition can be modified in the Scheduled Tasks window. Scheduled tasks that have read-only permission can be executed, and their definition cannot be modified. |
|||
|
Book Hierarchy |
Allows granting read/write and read-only access to book hierarchies. You can select _ALL_ to grant access to all book hierarchies. Book hierarchies that have read/write permission can be used for loading trades, and their definition can be modified in the Book Hierarchy window. Book hierarchies that have read-only permission can be used for loading trades, and their definition cannot be modified. |
|||
|
Dispatcher Config |
Allows granting read/write and read-only access to dispatcher configurations. You can select _ALL_ to grant access to all dispatcher configurations. Dispatcher configurations that have read/write permission can be used to run the dispatcher, and their definition can be modified in the Dispatcher Config window. Dispatcher configurations that have read-only permission can be used to run the dispatcher, and their definition cannot be modified. |
|||
|
Calculation Server Config |
Allows granting read/write and read-only access to Calculation Server configurations (Configuration > System > Calculation Server). You can select _ALL_ to grant access to all Calculation Server configurations. Calculation Server configurations that have read/write permission can be used to run risk on demand, and their definition can be modified in the Calculation Server Config window. Calculation Server configurations that have read-only permission can be used to run risk on demand, and their definition cannot be modified. |
|||
|
Presentation Config |
Allows granting read/write and read-only access to presentation server configurations (Configuration > System > Presentation Server). You can select _ALL_ to grant access to all presentation server configurations. Presentation server configurations that have read/write permission can be used to run presentation servers, and their definition can be modified in the Presentation Server Configuration window. Presentation server configurations that have read-only permission can be used to run presentation servers, and their definition cannot be modified. |
|||
|
MktData Server Config |
Allows granting read/write and read-only access to Market Data Server configurations. You can select _ALL_ to grant access to all Market Data Server configurations. Market Data Server configurations that have read/write permission can be used to run the Market Data Server, and their definition can be modified in the MktData Server Config window. Market Data Server configurations that have read-only permission can be used to run the Market Data Server, and their definition cannot be modified. |
|||
|
Risk OnDemand Config |
Allows granting read/write and read-only access to calculation servers (Configuration > Reporting & Risk > Calculation Server). You can select _ALL_ to grant access to all calculation servers. Calculation servers that have read/write permission can be used to run risk reports, and their setup can be modified in the Calculation Server Setup window. Calculation servers that have read-only permission can be used to run risk reports, and their definition cannot be modified. |
|||
|
Risk Presenter Config |
Allows granting read/write and read-only access to presentation servers (Configuration > Reporting & Risk > Presentation Server). You can select _ALL_ to grant access to all presentation servers. Presentation servers that have read/write permission can be used to run risk reports, and their setup can be modified in the Presentation Server Setup window. Presentation servers that have read-only permission can be used to run risk reports, and their definition cannot be modified. |
|||
|
Application Name |
Allows granting permission for executing applications. You can select _ALL_ to grant permission for executing all applications, or add applications individually. Applications names are defined in the domain "applicationName". |
|||
|
Market Data Types |
Allows granting read/write and read-only access to market data of specified types that do not belong to a pricer configuration, or to market data of specified types that belong to a pricer configuration if the environment property DISABLE_MDI_PC_PERMISSION_INHERITANCE is set to true. Otherwise, the market data types will follow the permissions of the pricer configuration. Market data of specified types that have read/write permission can be used in pricing, and their definition can be modified. Market data of specified types that have read-only permission can be used in pricing, and their definition cannot be modified. |
|||
|
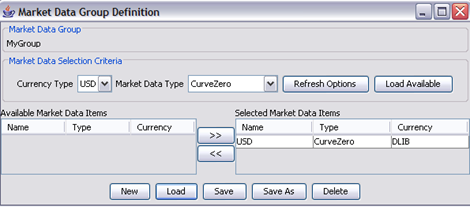
Market Data Groups |
Allows granting read/write and read-only access to market data of specified groups that do not belong to a pricer configuration, or to market data of specified groups that belong to a pricer configuration if the environment property DISABLE_MDI_PC_PERMISSION_INHERITANCE is set to true. Otherwise, the market data groups will follow the permissions of the pricer configuration. Market data of specified groups that have read/write permission can be used in pricing, and their definition can be modified. Market data of specified groups that have read-only permission can be used in pricing, and their definition cannot be modified. Market data groups are created in the Groups panel by clicking on the Market Data Groups button.
|
|||
|
Product Templates |
Allows granting read/write and read-only access to product templates. You can select _ALL_ to grant access to all product templates. Product templates that have read/write permission can be used in trades, and their definition can be modified. Product templates that have read-only permission can be used in trades, and their definition cannot be modified. |
|||
|
Report Templates |
Allows granting read/write and read-only access to report templates. You can select _ALL_ to grant access to all report templates. Report templates that have read/write permission can be used in reports, and their definition can be modified. Report templates that have read-only permission can be used in reports, and their definition cannot be modified. Note that private report templates do not appear here. They can only be used and modified by the user who created them. |
|||
|
Generic Comment Type |
Allows granting read/write and read-only access to generic comment types. You can select _ALL_ to grant access to all generic comment types. Generic comment types that have read/write permission can be viewed on objects and in reports, and they can be added to objects. Generic comment types that have read-only permission can be viewed on objects and in reports, and they cannot be added to objects. |
|||
|
Typed Legs |
Allows granting read/write and read-only access to exotic typed legs. You can select _ALL_ to grant access to all exotic typed legs. Exotic typed legs that have read/write permission can be used to capture trades, and their definition can be modified in the eXSP Type Creator window. Exotic typed legs that have read-only permission can be used to capture trades, and their definition cannot be modified. |
|||
|
HyperSurface Generators |
Allows granting read/write and read-only access to hypersurface generators. You can select _ALL_ to grant access to all hypersurface generators. Hypersurface generators that have read/write permission can be used to generate hypersurfaces, and their definition can be modified. Hypersurface generators that have read-only permission can be used to generate hypersurfaces, and their definition cannot be modified. |
|||
|
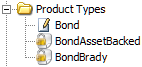
Product Types |
Allows granting read/write and read-only access to product types. You can select _ALL_ to grant access to all product types. Note that product types are also controlled by the Book Access panel. Product types that have read/write permission can be used to enter trades. Product types that have read-only permission cannot be used to enter trades (the trades on these product types can only be viewed). |
|||
|
Allows granting read/write and read-only access to individual products based on a static data filter. The static data filter must only contain product criteria. You can select _ALL_ to grant access to all products. Products that have read/write permission can be modified. Products that have read-only permission cannot be modified (they can only be viewed). |
||||
|
Products Trading |
Allows granting read/write and read-only access to individual products for trading based on a static data filter. The static data filter must only contain product criteria. You can select _ALL_ to grant access to all products. Note that you also need access to the corresponding product types. Also note that if a user belongs to multiple groups, and one of the groups uses Products Trading permissions, then the other groups the user belongs to must use Products Trading permissions as well. Products that have read/write permission can be used to enter trades. Products that have read-only permission cannot be used to enter trades (the trades on these products can only be viewed). |
|||
|
Action Event Type |
Allows granting access to performing trade lifecycle actions. You can select _ALL_ to grant access to all event types. Event types that have either read/write or read-only permissions are able to be performed by this group of users. |
|||
|
Benchmark Family |
Allows granting read/write and read-only access to benchmark families. You can select _ALL_ to grant access to all benchmark families. Benchmark families that have read/write permission can be assigned to benchmarks. The benchmarks belonging to these families can be used, and their definition can be modified. Benchmark families that have read-only permission can be assigned to benchmarks. The benchmarks belonging to these families can be used, and their definition cannot be modified. |
|||
|
Funds |
Allows granting read/write and read-only access to funds and mandates. You can select _ALL_ to grant access to all funds and mandates. Funds and mandates that have read/write permission can be associated with strategies, and their definition can be modified in the Fund or Mandate windows. Funds or mandates that have read-only permission cannot be associated with strategies, and their definition cannot be modified. |
|||
|
Strategy |
Allows granting read/write and read-only access to strategies. You can select _ALL_ to grant access to all strategies. Strategies that have read/write permission can be used to enter trades, and their definition can be modified in the Strategy window. Strategies that have read-only permission cannot be used to enter trades (the trades that belong to these strategies can only be viewed), and their definition cannot be modified. |
|||
|
Custom Portfolios |
Allows granting read/write and read-only access to custom portfolios. You can select _ALL_ to grant access to all custom portfolios. Custom portfolios that have read/write permission are displayed in the Portfolio Hierarchy window and in the PWS "Portfolios" drop down menu, and their definition can be modified in the Portfolio Hierarchy window. Custom portfolios that have read-only permission are displayed in the Portfolio Hierarchy window and in the PWS "Portfolios" drop down menu, and their definition cannot be modified. |
|||
|
Portfolio Hierarchies |
Allows granting read/write and read-only access to portfolio hierarchies. You can select _ALL_ to grant access to all portfolio hierarchies. There is no distinction between read/write and read-only access for portfolio hierarchies. Portfolio hierarchies that have read/write or read-only permission are displayed in the Portfolio Hierarchy window and in the PWS 'Portfolios' drop down menu. |
|||
|
Report Hierarchies |
Allows granting read/write and read-only access to groups. You can select _ALL_ to grant access to all groups. Group Access permissions on specific Report Hierarchies must be added in the Access Permissions > Group Access window. When adding Read/Write or Read Only Access, existing reports and report groups must be selectable in the dedicated selection dialog. |
|||
|
Scenario Market Data |
Allows granting read/write and read-only access to scenario market data sets. You can select _ALL_ to grant access to all market data sets. Market data sets that have read/write permission can be used to run scenarios, and their definition can be modified in the Scenario Editor window. Market data sets that have read-only permission can be used to run scenarios, and their definition cannot be modified. |
|||
|
Scenario Rule |
Allows granting read/write and read-only access to scenario rules. You can select _ALL_ to grant access to all scenario rules. Scenario rules that have read/write permission can be used to run scenarios, and their definition can be modified in the Scenario Editor window. Scenario rules that have read-only permission can be used to run scenarios, and their definition cannot be modified. |
|||
|
Audit Report Restriction |
Allows restricting access to audit report data. Audit report restrictions that have read/write permission are not restricted from viewing. Note that unless an audit report data type is expressly restricted by setting read-only permission on it, it will be viewable in audit reports. Audit report restrictions that have read-only permission restrict viewing audit report data of specified types. Selecting only _ALL_ will NOT restrict any data types - they must be selected individually. You also need to add the data types (audit classes) you wish to restrict to the auditReportRestrictable domain.
|
|||
|
Feed Config |
Allows granting read/write and read-only access to feed address mapping configurations. You can select _ALL_ to grant access to all feed address mapping configurations. Feed address mapping configurations that have read/write permission can be viewed, and their definition can be modified in the Feed Address window. Feed address mapping configurations that have read-only permission can be viewed, and their definition cannot be modified. |
|||
|
Hedge Accounting Standard |
Allows granting read/write and read-only access to hedge accounting standards. You can select _ALL_ to grant access to all hedge accounting standards. Hedge accounting standards that have read/write permission can be used in hedge strategy definition, and hedge strategies using them can be modified. Hedge accounting standards that have read-only permission cannot be used in hedge strategy definition, and hedge strategies using them cannot be modified (they can only be viewed). |
|||
|
Data Segregation Apps |
For an implementation that includes eSelfService, the Data Segregation folder contains only a single entry for CalypsoBusinessServices. Data Segregation has no function for standard Calypso installations and will typically have no entries. |
|||
|
Rating Agencies |
Allows granting read/write and read-only access to rating agencies. You can select _ALL_ to grant access to all rating agencies. Rating agencies that have read/write permission can be used in legal entity credit ratings, and credit ratings for the corresponding agencies can be modified. Rating agencies that have read-only permission can be used in legal entity credit ratings, and credit ratings for the corresponding agencies cannot be modified. |
|||
|
Task Station Tabs |
Allows granting read/write and read-only access to Task Station tabs. You can select _ALL_ to grant access to all Task Station tabs. Task Station tabs that have read/write permission can be accessed, and their configuration can be modified in the Task Station Tabs panel. Task Station tabs that have read-only permission can be accessed, and their configuration cannot be modified. |
|||
|
Task Station Filters |
Allows granting read/write and read-only access to Task Station enrichment filters. You can select _ALL_ to grant access to all Task Station enrichment filters. Task Station enrichment filters that have read/write permission can be used to filter tasks, and their definition can be modified in the Task Enrichment Filters panel. Task Station enrichment filters that have read-only permission cannot be used to filter tasks, and their definition cannot be modified. |
|||
|
Report Browser Configs |
Allows granting read/write and read-only access to Report Browser configurations. You can select _ALL_ to grant access to all Report Browser configurations. Report Browser configurations that have read/write permission can be used to view reports, and their definition can be modified in the Report Browser. Report Browser configurations that have read-only permission can be used to view reports, and their definition cannot be modified. |
|||
|
OptimizationConfiguration |
Allows granting read/write and read-only access to collateral optimization configurations. You can select _ANY_ to grant access to any optimization configuration. Optimization configurations that have read/write permission can be viewed, and their definition can be modified in the Collateral Optimization Configuration window. Optimization configurations that have read-only permission can be viewed, and their definition cannot be modified. |
|||
|
TargetConfiguration |
Allows granting read/write and read-only access to collateral target configurations. You can select _ANY_ to grant access to any target configuration. Target configurations that have read/write permission can be viewed, and their definition can be modified in the Target Configuration window. Target configurations that have read-only permission can be viewed, and their definition cannot be modified. |
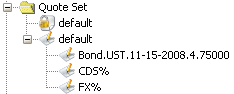
Group Access Permission for Subsets of Quotes
For quote sets, you can further define permissions on subsets of quotes. For example, a given user group could set FX quotes, while another user group could set bond quotes. Each group of quote is identified using a wild card mechanism. So FX quotes would be identified as FX% (all quotes starting with FX).
| » | You first need to define the groups of quotes, or individual quotes in the quoteGroup domain. |
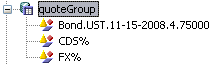
| » | Then, in the Group Access panel, select the Quote Set node, and click Add Read/Write or Add Read Only to define permissions on quote sets. You will be prompted to select quote sets. |

| » | Finally, select the quote set and click Limit. You will be able to select quote groups as applicable. |
Sample Restrictions
Read or write permission is per quote set, i.e. you can have permission to write to a quote set or parts of it by specifying the wildcard.
| • | Read/write access on Quote Set A and FX% means you can save only FX quotes in Quote Set A. |
| • | Read-only access on Quote Set B means you can only view quotes in Quote Set B. You cannot modify any quote. |
| • | A typical case might be that a user can read all quotes in Quote Set C but can only modify a subset of them. So the setup would be read-only access on Quote Set C and read/write access on Quote Set C with limits on groups of quotes. |
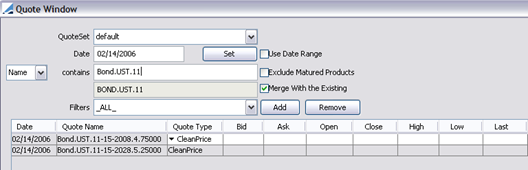
In the Quote window (Calypso Navigator > Market Data > Market Quotes > Quotes, menu action marketdata.QuoteJFrame) read/write rows are displayed with a white background, while read-only rows are grayed out and cannot be modified.
Automatic Propagation of Access Permissions
When Static Data Filters, Trade Filters and Filter Sets are created, they are automatically granted read/write permissions for all the user groups to which the user who created them belongs under the Access entities: Static Data Filters, Trade Filters and Filter Sets.
If you want to use the following Access entities instead: Static Data Filter Groups, Trade Filer Groups and Filter Set Groups, you may disable that automatic propagation to individual filters by removing the corresponding entities from domain "propagateFilterAccessPermission":
| • | FilterSet |
| • | StaticDataFilter |
| • | TradeFilter |
When books are created, they are automatically granted read/write permissions for all the user groups to which the user who created them belongs under the Access entity: Books unless:
| • | The user group has access to _ANY_ books (as access is already granted to all books) |
| • | The user group does not have access to any book. In this case, if you want the access permissions to be propagated for new books, you need to give the user group access to at least one book. |
6. Specifying Book Permissions
Select the Book Access panel to specify book permissions as applicable. For a given book, you can specify the currencies, currency pairs and products that can be traded in that book.
The book permissions apply regardless of the user. However, using the Group Access panel, you can specify the books that a group of users has access to.
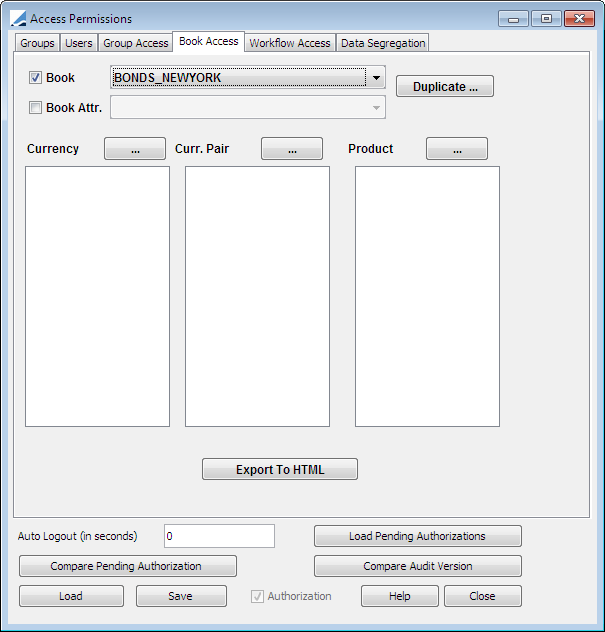
| » | Select a book from the Book field. |
| » | You can click Duplicate to copy the permissions of another book. You will be prompted to select a book. |
| » | Click the ... button next to the Currency field to select the currencies that can be traded in the selected book. |
| » | Click the ... button next to the Curr. Pair field to select the currency pairs that can be traded in the selected book. |
| » | Click the ... button next to the Product field to select the products that can be traded in the selected book. |
| » | There is no local save button, so it is recommended to click the general Save button before proceeding to another panel. |
Provided a group of users has read/write access to the selected book, the users will be restricted to enter trades in the specified currencies and currency pairs, and for the specified products.
| » | Click Export to HTML to print the book permissions to an HTML file. |
7. Specifying Workflow Permissions
Select the Workflow Access panel to specify what actions the users can apply to trades, transfers, messages and tasks, based on the products that are being processed, provided they are in the specified status.
For example, a given user can enter a trade in pending status, another user can verify the trade, and yet another user can process the payment.
Note that there must be a workflow transition corresponding to each status and action selected here. You can view workflow transitions using Calypso Navigator > Configuration > Workflow > Workflow Graph (menu action refdata.WorkflowGraphJFrame).
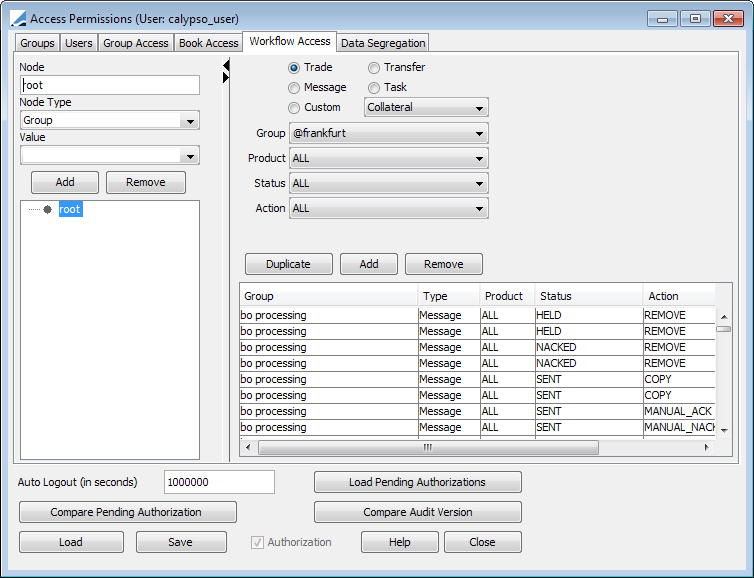
| » | Use the right-hand side area to add, remove, and duplicate restrictions on actions. |
Select the entity for which you want to specify actions using the radio buttons: Trade, Transfer, Message or Task.
Select a group of users from the Group field, a status from the Status field, a product from the Product field, and an action from the Action field.
For a message, you can also select a message type.
You can select ALL for status, product, action, and message type, as applicable.
Then click Add to add the permission. The permission will appear in the table at the bottom of the window. You can click any column header to sort the table on the corresponding column.
There is no local save button, so it is recommended to click the general Save button before proceeding to another panel.
| » | Use the left-hand side area to browse the existing restrictions. If you click the root label, all restrictions will be displayed on the right-hand side. You can setup multiple hierarchies based on any of the following elements: Group, AccessType, Product, Status, Action, MessageType. |
Select a node, then select a node type and click Add to add a new level.
When you select a node, the corresponding restrictions will be displayed in the right-hand side.
8. Data Segregation
Use the Data Segregation tab on the Access Permissions window to associate eSelfService users with the proper Legal Entity and Groups. The Data Segregation tab has no function for standard Calypso installations.
Ⓘ [NOTE: Only Groups having permissions set on the Data Segregation Apps node of the Group Access tab are available for selection]
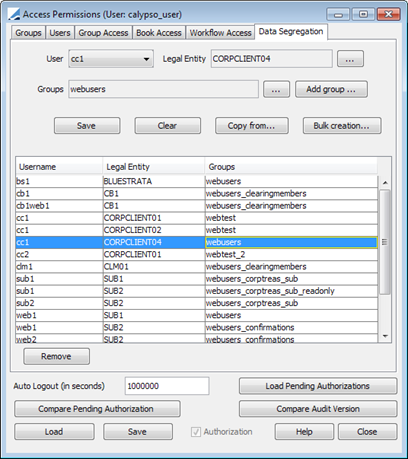
| » | Select a User, Legal Entity, and Group. |
| » | Click Save (below the Groups field) to create the association. |
Note that if the Authorization mode is enabled, an authorized user must approve your entry.
To associate a particular user or group with multiple Legal Entities, do so one record at a time by repeating Steps 1 and 2 as necessary.
Click Save on the bottom of the Access Permissions window to store the associations in the database.
Note that if the Authorization mode is enabled, an authorized user must approve your entry.
Refer to the Calypso eSelfService Installation and Configuration Guide for further information on configuring eSelfService.