Data Authorization
Calypso provides the ability to run the system in Authorization mode. In Authorization mode, any change to static data must be authorized by an authorization user. An authorization user is a user who has permission to authorize modifications and who is different from the user who actually made the modifications.
 Please refer to the Calypso Installation Guide for details on enabling Authorization mode.
The Authorization mode only applies to classes specified in the classAuthMode domain. You can remove a given class from that domain as applicable using Calypso Navigator > Configuration > System > Domain Values (menu action refdata.DomainValueWindow) to disable the Authorization mode for that class.
See Authorizable Objects for a list of all objects that support authorization.
You can also disable a given class for a given processing organization only using the domain classNotAuth. You can add values to that domain in the form "<ProcessingOrg ID>.<class name>" to disable authorization of the given class for the given processing organization.
Example: "10.LEContact" – All changes to the legal entity contacts of processing org # 10 will not need authorization.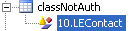
For information on making your own custom classes authorizable, refer to the Calypso Developer's Guide.
Data Modification
When new static data is entered or static data is modified, it is not be visible to any user (including the user who made the modification) until the data is actually authorized.
In most windows, an Authorization checkbox will appear checked and grayed-out as shown below to indicate that the Authorization mode is enabled.
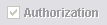
A Show Auth button or Show Pending button will also be available to allow viewing any pending authorization.
When you click Show Auth or Show Pending, a pending authorizations window will appear as in the example below.
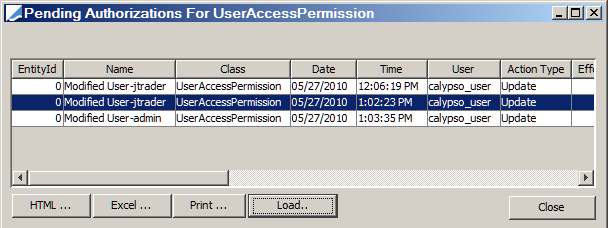
It displays all data that have been modified and require authorization before they can be actually saved.
| » | Click Close when you are done. |
Data Authorization
The actual authorization of data can be done using the Data Authorization window or using the Authorization task by an authorization user. See below for details.
A user can accept self-modifications provided the SameUserAuthorization function is granted to the group of the user or the user is an Admin user (a user from a "Is Admin" group).
A user can reject self-modifications provided the SameUserRejection is granted to the group of the user or the user is an Admin user.
Trade Authorization
For information on using the Authorization mode for trades, please refer to Calypso Workflow documentation - Trade Workflow Manual Authorization.
1. Using the Data Authorization Window
To authorize new and modified data, choose Calypso Navigator > Processing > Data Authorization (menu action refdata.AuthorizationWindow). The Data Authorization window will appear as shown below.
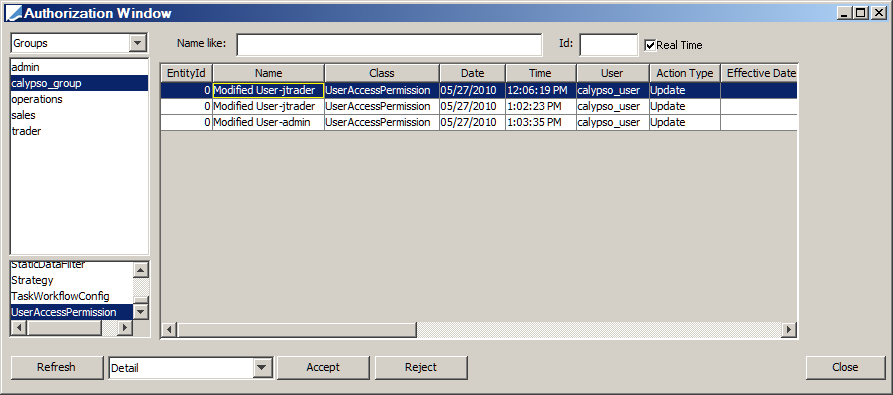
| » | Select Users or Groups from the field in the upper-left corner. Then select a user or a group from the list as applicable, to filter the pending authorizations for that user or group. Select a class from the list at the lower-left corner as applicable, to filter the pending authorizations for that class. |
You can also specify one or more characters in the "Name like" field to filter entity names that start with these characters. Or you can enter an object id in the Id field to load an individual object.
Then click Refresh to load the pending authorizations for the specified criteria.
| » | Select Detail or Version from the field next to the Refresh button to display the pending authorizations per version, or to show the individual modifications. There will only be a difference when multiple changes have been made to a given entity version. |
| » | The Real Time checkbox is checked by default to remove authorized data or rejected data in real-time from the Data Authorization window. This prevents conflicts when multiple users are authorizing data at the same time. |
| » | You can double-click a row to view the details of an object. |
| » | Enumerated Fields - Use the tables in Enumerated Field Keys to determine the human readable values. |
See Enumerated Field Keys for details.
| » | Select a row or multiple rows and click Accept to authorize the modification. You can also click Reject to reject the modification. |
Note that if the Access Permissions mode is enabled, you will be able to modify individual changes only if your group is granted the ApplyIndividualAuth function. Otherwise you will only be able to authorize versions.
| » | You can right-click a row and select Configure Columns to customize the columns if desired. |
Access Permissions
Data authorization using the Data Authorization window is controlled by a number of functions: You need "Authorization" functions for all the objects you wish to authorize: AuthorizeAccount, AuthorizeBook, AuthorizeCountry, AuthorizeHoliday, etc.
See the Access Permissions general resource for details on these functions.

Certain fields are represented by enumerations rather than words. The example below shows the SDI table:

The following table provides keys for the "_payReceive" column in an SDI record:
|
_type Value |
Meaning & Description |
|---|---|
|
0 |
BOTH - SDI is for pay and receive. |
|
1 |
PAY - SDI is for the pay direction. |
|
2 |
RECEIVE - SDI is for the receive direction. |
The following table provides keys for the "_type" column in an SDI record:
|
_type Value |
Meaning & Description |
|---|---|
|
0 |
BOTH - Payment is cash and security. |
|
1 |
CASH - Payment is cash. |
|
2 |
SECURITY - Payment is in securities. |
The example below shows the Holiday Rules table:

The following tables provide keys for "_dayofweek", "_month", "_rank", and "_type":
"_dayofweek" Column:
|
_dayofweek Value |
Weekday |
|---|---|
|
1 |
NONE |
|
2 |
Monday |
|
3 |
Tuesday |
|
4 |
Wednesday |
|
5 |
Thursday |
|
6 |
Friday |
|
7 |
Saturday |
|
8 |
Sunday |
"_month" Column:
|
_month Value |
Month |
|---|---|
|
1 |
January |
|
2 |
February |
|
3 |
March |
|
4 |
April |
|
5 |
May |
|
6 |
June |
|
7 |
July |
|
8 |
August |
|
9 |
September |
|
10 |
October |
|
11 |
November |
|
12 |
December |
"_rank" Column:
|
_rank Value |
Rank |
|---|---|
|
0 |
NONE |
|
1 |
FIRST |
|
2 |
SECOND |
|
3 |
THIRD |
|
4 |
FOURTH |
|
5 |
LAST |
"_type" Column:
|
_type Value |
Meaning & Description |
|---|---|
|
0 |
FIXED - This holiday occurs on the same date each year. |
|
1 |
FLOAT - The calendar date of this holiday varies from year to year. |
|
2 |
EASTER - Easter. |
2. Using the Authorization Task
In order to use the Authorization task, you need to set the environment property AUTHORIZATION_TASK=true.
You will be able to display authorization exceptions in the Task Station and accept or reject the modification.
Note that only modifications that have been made after the environment property AUTHORIZATION_TASK is set to true will appear.
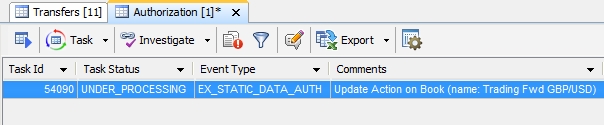
| » | Right-click a row, process it, and choose Workflow > Accept or Workflow > Reject from the popup menu to authorize or reject the modification. You can view details on the Task Summary panel. |
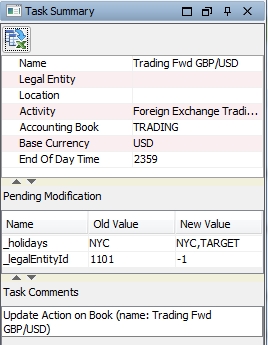
| » | You can also choose Workflow > Show Modifs to bring up the Data Authorization window, and Workflow > Show Object to bring up the corresponding data configuration window. |
The default exception is EX_STATIC_DATA_AUTH but you can define specific authorization tasks for each type of modified data.
Example: Add MANUALPOSTING_AUTH to the exceptionType domain, and EX_MANUALPOSTING_AUTH to the eventType domain to have a specific authorization task for manual postings.
The following objects can be authorized using the Authorization Task mechanism: Account, CollateralConfig, LEContact, LegalEntity, LegalEntityAttribute, SettleDeliveryInstruction, HaircutRule, Legal Agreements, Margin Contracts, QuoteValue, StaticDataFilter, AccountSweepingConfig, AdviceConfig, Bond, BondAssetBacked, BondFRN, BondMMDiscount, Holiday, LegalEntityRelation.
You will create the exception type and event type as "<object name from classAuthMode in uppercase>_AUTH" and "EX_<object name from classAuthMode in uppercase>_AUTH" respectively.
Access Permissions
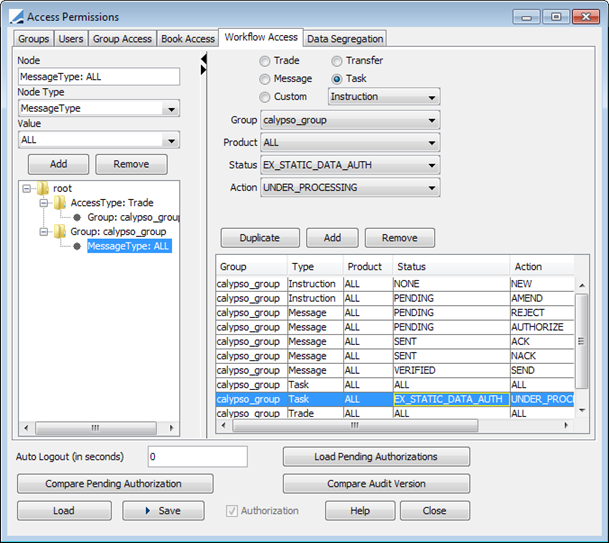
You need access to the UNDER_PROCESSING action for tasks in status EX_STATIC_DATA_AUTH (or other customized status), for authorizing modifications using the Authorization task.
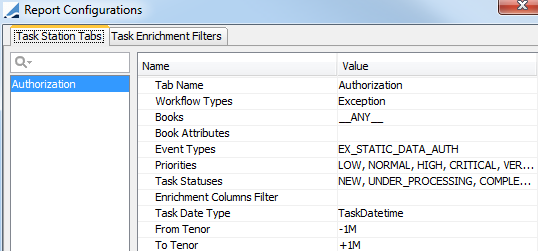
Authorizing SDIs by Contact Type
You can define a Task Enrichment field for the SDI contact type and filter EX_STATIC_DATA_AUTH tasks by SDI contact type.

Task Enrichment Field:
Field Display Name = Auth SDI Contact Type
Field Db Name = auth_sdi_contact_type
Workflow Type = CrossWorkflows
Data Source Class = com.calypso.bo.task
Custom Class = com.calypso.taskenrichment.data.enrichment.DefaultTaskEnrichmentCustom
Data Source Getter Info = getSDIContactType.
Please refer to Calypso Task Station documentation for complete details on defining enrichment fields.
3. Creating an Authorization User
When the administrator has enabled Authorization mode, changes to certain data must be authorized by a special user, known as the Authorization User. Depending on the size of your implementation and volumes, there may be one or several such users.
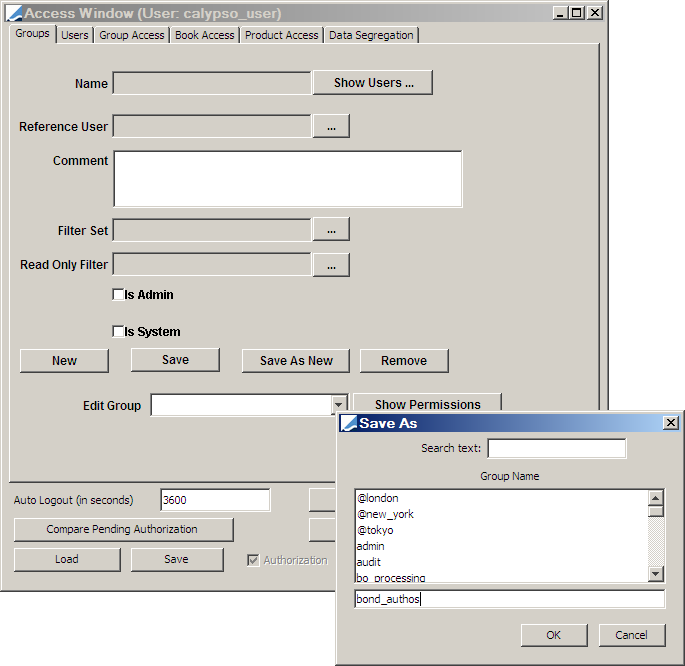
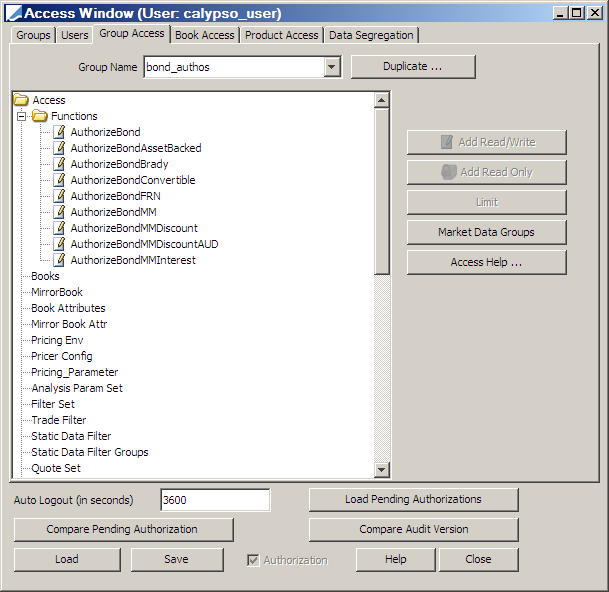
On the Access Permissions window, use the Group tab to create a group that will have Access Permission for the data that the user will authorize. Our example shows the process for creating a group for "Bonds" Authorization Users. Permissions are applied to a group and the user is then assigned to the group.
To begin, click New, then click Save As New. Enter the desired group name in the Save As dialog, then click OK.
1. From the Group Access tab, select Functions on the Access list, then click Add Read/Write.
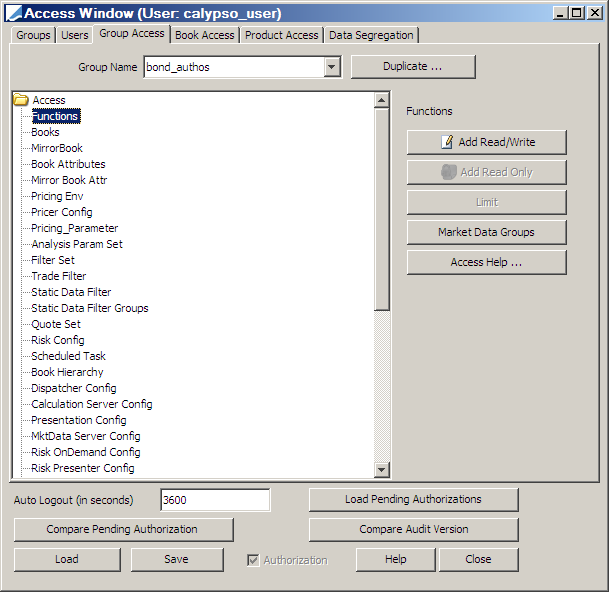
2. In the Select Function window, choose the desired authorizations, then click OK:
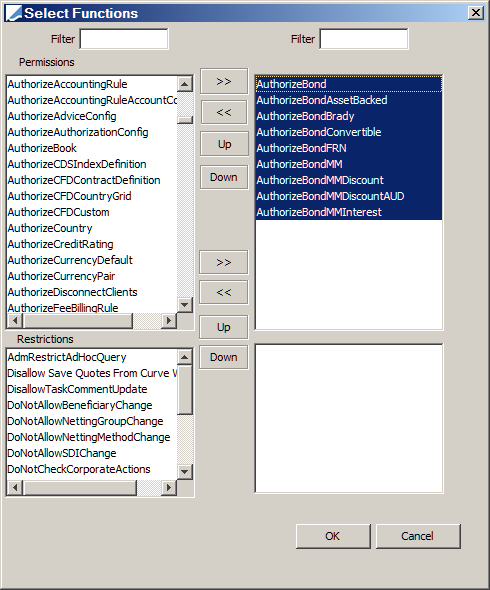
3. On the Access Permissions window, click Save to save the changes to the group:
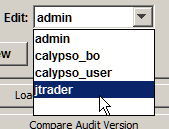
4. On the Users tab, choose the desired user:
5. Click ... to open the Select Groups window:
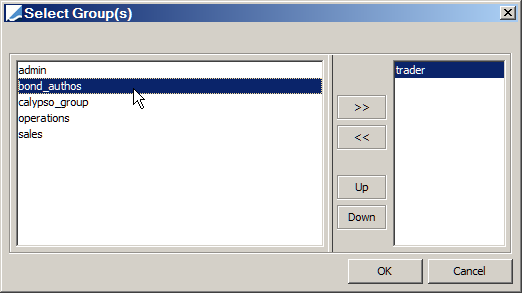
6. Double-click the group having the authorization permissions, then click OK.
In our example, the user jtrader now is now a member of the bond_authos group. Members of the bond_authos group are Authorization Users who can accept or reject changes to bond data.

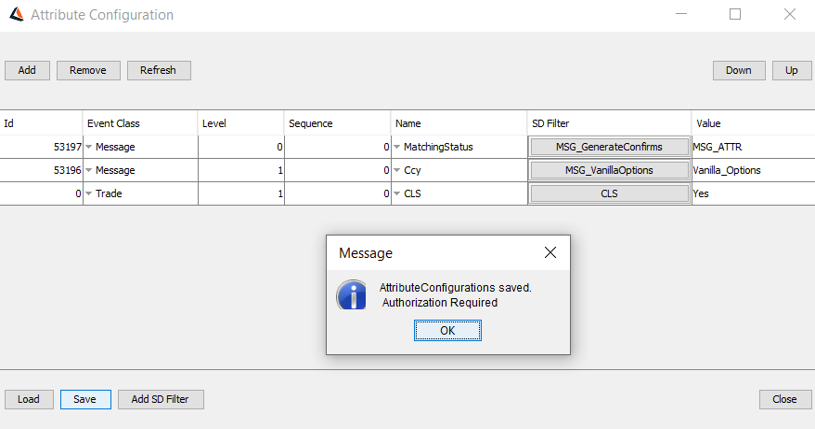
4. Data Authorization for Attribute Configuration Window
In order to use Data Authorization for Attribute Configuration Window, you need to set the environment property DATA_AUTHORIZATION_ENABLED=true and AUTHORIZATION_TASK=true.
You will be able to create, modify and remove any entry from the Attribute Configuration Window. For data authorization, it will undergo four-eye check functionality once the authorization mode is enabled. You will receive a request to accept or reject the modifications in Authorization Window.
You can view the recorded entries in Authorization Audit Window.