Capturing Bond Option Trades
This document describes how to capture bond option trades using the Bond Option worksheet.
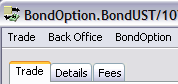
Navigate to Trade > Fixed Income > OTC Bond Options to open the Bond Trade window, from the Calypso Navigator or from the Trade Blotter.
Prior to capturing bond trades, you need to specify bond products using Configuration > Fixed Income > Bond Product Definition.
 See Defining Bond Products for details.
|
Bond Option Quick Reference
Entering Trade Details
Or you can enter the trade fields directly. They are described below. Note that the Trade Date is entered in the Details panel.
Saving a Trade
You can also hit F3 to save the current trade as a new trade, or choose Trade > Save As New. A description will appear in the title bar of the trade worksheet, a trade id will be assigned to the trade, and the status of the trade will be modified according to the workflow configuration. Pricing a Trade
Trade Lifecycle
|
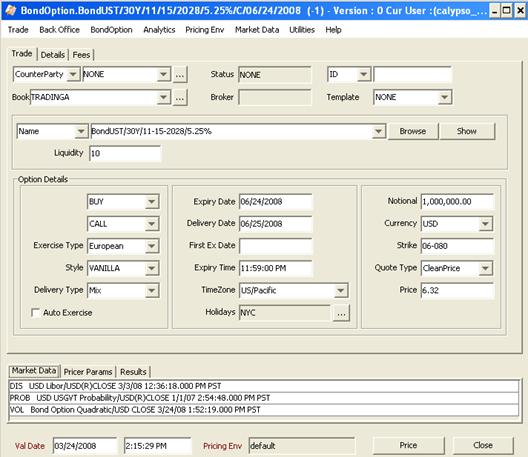
1. Sample Bond Option Trade
Bond Option Trade - Fields Details
|
Fields |
Description |
|||||||||
|
Trade Details |
||||||||||
|
Role / Cpty |
The first two fields of the worksheet identify the trade counterparty. The first field identifies the trade counterparty’s role. The default role is specified using Utilities > Set Default Role. However, you can change it as applicable. You can select a legal entity of specified role from the second field provided you have set up favorite counterparties. You can also type in a character to display the favorite counterparties that start with that character. Favorite counterparties are specified using Utilities > Configure Favorite Counterparties. Otherwise, click ... to select a legal entity of specified role from the Legal Entity Chooser. You can also type [Ctrl-F] to invoke the Legal Entity Chooser, or directly enter a Legal Entity short name. |
|||||||||
|
Status |
Current status of the trade. The status is automatically assigned by the system based on the workflow configuration. The status will change over the lifetime of the trade according to the workflow configuration and the actions performed on the trade. |
|||||||||
|
Id Ext Ref Int Ref |
Unique identification number of the trade. The trade id is automatically assigned by the system when the trade is saved. You can load an existing trade by typing the trade id into this field, and pressing [Enter]. You can also display the internal reference of external reference. The default trade reference can be selected in the User Defaults. The internal reference and external reference can be set in the Details panel of the trade worksheet. |
|||||||||
|
Book |
Trading book to which the trade belongs. Defaults to the book selected in the User Defaults. You can modify as applicable. You can select a book provided you have set up favorite books. Favorite books are specified using Utilities > Configure Favorite Books. Otherwise, click ... to select a book. The owner of the book (a processing organization) identifies your side of the trade. |
|||||||||
|
Broker |
Displays the broker if a broker fee is captured in the Fees panel. |
|||||||||
|
Template |
You can select a template from the Template field to populate the worksheet with default values. Then modify the fields as applicable. |
|||||||||
|
Underlying Bond Details |
||||||||||
|
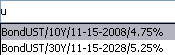
Product code Product description |
You can select a bond using one of the following methods: Product Code Selection or Browser Selection, they are described below. Once you have selected a bond, the value of the alternative product code is displayed in the field adjacent to the Browse button. The alternative product code is specified in the User Defaults. You can click Show to view the details of the selected bond. Product Code Selection The product code defaults to the security code specified in the User Defaults. You can select another product code as applicable. Note that the Name product code searches the bond short names.
The system searches all the bonds defined in the system, unless a quick entry template has been specified, in which case the system only searches the bonds filtered by the quick entry template. Also, if the environment property USE_SUBSTRING_IN_BOND_NAME_QUERY=true is set, the system searches all the letters in the product code values. Otherwise, it only searches from the start. The bonds that satisfy the request are displayed in a list.
Browser Selection Click Browse to select a product from a user-defined bond browser. See Defining Bond Browsers for information on creating bond browsers.
If you do not have report templates, simply click Search to browse all existing bonds. You can right-click any column and choose Configure Columns to customize the display. |
|||||||||
|
Liquidity |
Enter the liquidity factor of the bond. |
|||||||||
|
Option Details |
||||||||||
|
BUY/SELL |
Direction of the trade from the book’s perspective. Double-click the BUY label to switch to SELL as applicable. |
|||||||||
|
CALL/PUT |
Direction of the option. Double-click the CALL label to switch to PUT as applicable. |
|||||||||
|
Exercise Type |
Select European or American. |
|||||||||
|
Style |
Only VANILLA is available. |
|||||||||
|
Delivery Type |
Select the delivery type: Mix, Cash or Physical. |
|||||||||
|
Auto Exercise |
Check the “Auto Exercise” checkbox to allow automatic exercise. Bond options can be automatically exercised using the AUTOMATIC_EXERCISE scheduled task, provided they are in-the-money. Otherwise, choose Back Office > Exercise to exercise the option. Help is provided from that window. |
|||||||||
|
Expiry Date |
Enter the expiration date. It is also the last exercise date for American options. |
|||||||||
|
Delivery Date |
Enter the delivery date. It defaults to Expiry Date + bond’s Settle Days. |
|||||||||
|
First Ex Date |
This field is only active for American options. Enter the first exercise date. |
|||||||||
|
Expiry Time |
Enter the time at which the option expires, in the selected timezone. |
|||||||||
|
TimeZone |
Select the timezone for the expiration time. |
|||||||||
|
Holidays |
Click ... to select holiday calendars. |
|||||||||
|
Notional |
Enter the notional amount of the underlying bond. |
|||||||||
|
Currency |
Select the currency you are using to buy or sell. |
|||||||||
|
Strike |
Enter the strike price. |
|||||||||
|
Quote Type |
Select the quote type of the strike price. It defaults to the quote type of the selected bond. Note that the strike is always considered as a dirty price. |
|||||||||
|
Price |
Enter the option price. |
|||||||||