Back Office Browser
The Back Office Browser (BO Browser) allows viewing all the back office activity for a given trade or a given bundle, and applying additional actions as needed.
It can be launched from the Calypso Navigator using Reports > BO Browser, from any trade window, and from the Task Station.
Contents
- Viewing Transfer Rules and Settlement Instructions
1. Tour of the BO Browser

BO Browser (general tour)
The BO Browser shows the following windows:
| • | A panel for each BO Trade Browser, each BO Bundle Browser, and each BO Trade Internal Ref Browser currently open. |
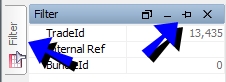
| • | A "Filter" window - To display the selection criteria: Trade ID, Internal Ref, or Bundle ID. |
| • | A panel for each type of back office data: Transfer rules, Transfers, Settlements, Messages, Postings, CREs, Liquidation, Trade Diary, and Tasks. There might be additional panels based on which modules are installed. |
| • | A "Details" window - When you select a back office data (a message, a transfer, etc.), this window displays additional details, and allows applying actions to the selected back office data. |
| • | A toolbar to load, save, delete, and reset custom layouts. |
These windows are described below.
You can choose ![]() > Frames to close / open the various windows.
> Frames to close / open the various windows.
You can hide a window by clicking ![]() . It will appear as a tab as shown for the Filter window below.
. It will appear as a tab as shown for the Filter window below.
Filter Window (shown as at tab when hidden)
To bring it back, click the tab and click ![]() .
.
Filter Window (bringing back a hidden window)
At
any time, you can choose ![]() Layout > Reset Layout to
reset the window layout.
Layout > Reset Layout to
reset the window layout.
You can click on ![]() , and choose to load, save, delete, or reset a layout.
, and choose to load, save, delete, or reset a layout.
If you choose to delete a layout, it will no longer appear to the right of the ![]() icon.
icon.
2. Loading a Trade
BO Trade Browser
"BO Trade Browser" is selected by default at the top of the window.
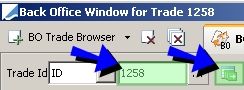
BO Trade Browser (loading a trade)
| » | Enter a trade ID, and click |
You can also click ... to search trades using the Trade Selector window, and select a trade.
The trade details appear in a "BO Trade Browser" panel.
| » | To load another trade, click "BO Trade Browser" - It will open another "BO Trade Browser" where you can select another trade. |
| » | You can click |
| » | You can click |
BO Trade Internal Ref Browser
You can also load trades using their internal reference.
Click the down arrow next to "BO Trade Browser" and select "BO Internal Ref Browser" - It will open a "BO Trade Internal Ref Browser" - Select "Int Ref" in the Trade Id field, and enter an internal reference in the adjacent field. Then click ![]() . All the trades with the same internal reference will be loaded.
. All the trades with the same internal reference will be loaded.
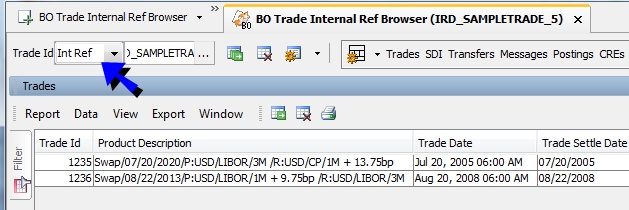
BO Trade Internal Ref Browser (the Trades panel shows the trades for the selected internal reference)
3. Loading a Bundle
Click the down arrow next to "BO Trade Browser" and select "BO Bundle Browser" - It will open a "BO Bundle Browser", and you can select a bundle.
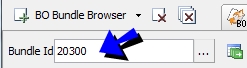
BO Bundle Browser (loading a bundle)
| » | Enter a bundle ID, and click |
You can also click ... to search bundles using the Bundle Selector, and select a bundle.
The bundle details appear in a "BO Bundle Browser" panel.
The "BO Bundle Browser" panel has an additional panel that allows viewing the trades in the bundle.
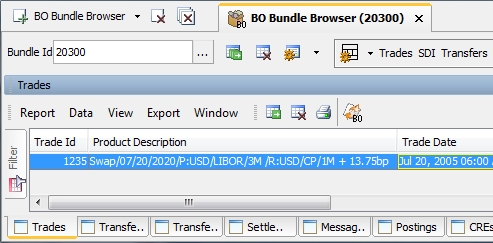
BO Bundle Browser (the Trades panel shows the trades in the selected bundle)
You can select a trade to view its details in the Details window.
You can select a trade and click ![]() to open a BO Trade Browser for the selected trade.
to open a BO Trade Browser for the selected trade.
The other panels are described below.
| » | To load another bundle, click "BO Bundle Browser" - It will open another "BO Bundle Browser" where you can select another bundle. |
4. Viewing Transfer Rules and Settlement Instructions
Load a trade or a trade bundle, and select the "Transfer rules" panel. It displays the transfer rules (types of cashflows that can be generated), and their corresponding settlement instructions (SDIs).
For example, if a trade is generating PAY PRINCIPAL cashflows, PAY INTEREST cashflows, and RECEIVE INTEREST cashflows, there will be a transfer rule for each type of cashflows so that when the transfers are generated from the cashflows, they can follow the instructions of the transfer rule: which settlement instructions to use, which settlement type to use, which netting type to use, etc.
![]()
BO Browser (the "Transfer Rules" panel shows transfer rules and settlement instructions)
Step 1 - You can select a transfer rule to view its details and associated settlement instructions in the Details window. The settlements instructions are displayed in the "SDIs" panel.
You can configure the "Transfers rules" and "SDIs" panels using the menu items.
 Click here for details on the menu items.
You can select a transfer rule and click ![]() to view details of the SDI route.
to view details of the SDI route.
See Viewing the SDI Route for details.
Step 2 - The Details window shows the details of the selected transfer rule.
The settlement instructions are automatically assigned by the system if preferred SDIs have been defined.
Otherwise, you can select non-preferred SDIs, or you can click ![]() to define SDIs. It brings up the Settlement and Delivery window - Help is available from that window.
to define SDIs. It brings up the Settlement and Delivery window - Help is available from that window.
If the SDIs are not known, you can save the trade without SDIs, and assign them later.
If none of these options are suitable because the SDIs are exception SDIs, you can associate "manual" SDIs to the transfer rule.
See Selecting non-Preferred SDIs for details.
See Associating Manual SDIs for details.
If you make any change to the transfer rules but do not want to keep these changes, you can click ![]() to reset the transfer rules.
to reset the transfer rules.
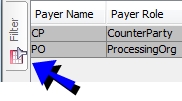
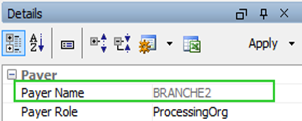
You can use the domain “DisabledTradeTransferRuleDetailView” - Any value from the Transfer Rule Details window added to this domain will not be editable. Example “Payer Name”.
If you modify the counterparty SDI, the PO SDI can be adjusted automatically if environment property PO_SDI_AUTO_ASSIGN = true. In this case, the PO SDI is automatically adjusted if there is an eligible SDI. If there is no eligible SDI, the PO SDI is set to TBA.
4.1 Selecting Non-Preferred SDIs
In the Details window, click the down arrow next to the field "Receiver Instructions" or "Payer Instructions" as needed.
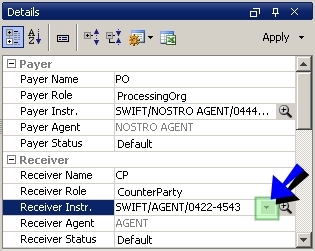
Details window (select SDI)
It brings up the SDI Chooser window.
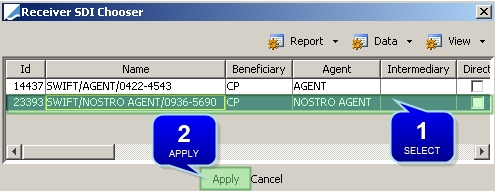
SDI Chooser window
You can configure the SDI Chooser using the menu items.
Click here for details on the menu items.
Step 1 - Select a different SDI, like a non-preferred SDI.
Step 2 - Click Apply in the Details window in order for the new SDI to be saved with the transfer rule.
The transfer rule will appear with a green background in status Assigned, indicating that it has been customized.
You can use the trade workflow rule CheckCustomTransferRules to check the validity of SDIs associated with customized transfer rules.
4.2 Associating Manual SDIs
Ⓘ [NOTE: You can only associate manual SDIs for the counterparty]
In the Details window, check the "Manual SDI" checkbox.

Details window (set manual SDI)
Step 1 - Check "Manual SDI".
Step 2 - If you have already created manual SDIs, click the down arrow next to the field "Receiver Instructions" or "Payer Instructions" as needed. It brings up the SDI Chooser as described above.
Otherwise, click ![]() to bring up the Cash Manual SDI window that allows creating manual SDIs.
to bring up the Cash Manual SDI window that allows creating manual SDIs.
Help is available from that window.
Step 3 - Click Apply in the Details window in order for the new SDI to be saved with the transfer rule.
The transfer rule will appear with a pink background in status Manual.
4.3 Viewing the SDI Route
Select a transfer rule and click ![]() . It displays the details of the SDI route.
. It displays the details of the SDI route.
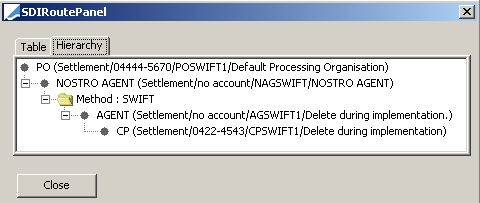
SDI Route
| » | You can select the Table panel to view the SDI route in tabular form. |
5. Viewing Transfers
Load a trade or a trade bundle, and select the "Transfers" panel. It displays the expected transfers that have been generated by the Transfer engine.
Refer to Calypso Settlements documentation for information on generating transfers.
![]()
BO Browser (the "Transfers" panel shows expected transfers)
You can configure the Transfers panel using the menu items.
Click here for details on the menu items.
You can select a transfer to view its details in the Details window.
You can right-click a transfer and show additional information, or apply actions.
6. Viewing Settlements
Load a trade or a trade bundle, and select the "Settlements" panel. It displays the known transfers. A known transfer is a transfer for a fixed settlement amount, a transfer for a floating amount that has been reset, or a netted transfer that has been released for settlement.
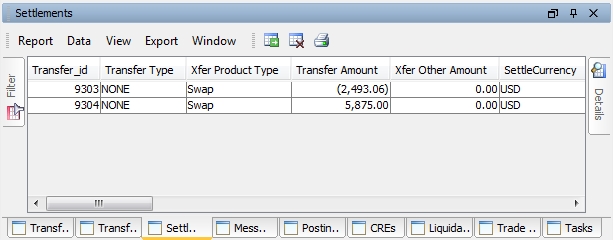
BO Browser (the "Settlements" panel shows known transfers)
You can configure the Settlements panel using the menu items.
Click here for details on the menu items.
You can select a settlement to view its details in the Details window.
You can right-click a settlement and show additional information, or apply actions.
7. Viewing Messages
Load a trade or a trade bundle, and select the "Messages" panel. It displays the messages that have been generated by the Message engine.
Refer to Calypso Messages documentation for information on generating messages.
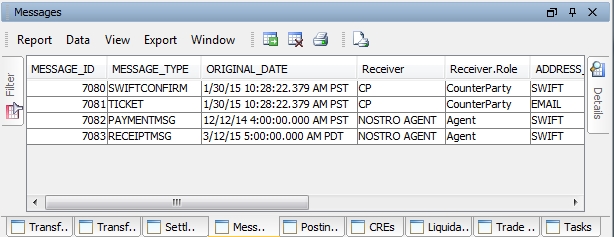
BO Browser (the "Messages" panel shows messages)
You can configure the Messages panel using the menu items.
Click here for details on the menu items.
You can select a message to view its details in the Details window.
You can double-click a message to view the actual document.
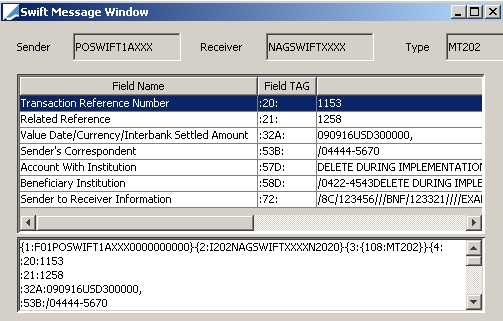
You can right-click a message and show additional information, or apply actions.
8. Viewing Postings
Load a trade or a trade bundle, and select the "Postings" panel. It displays the postings that have been generated by the Accounting engine.
Refer to Calypso Accounting documentation for information on generating postings.
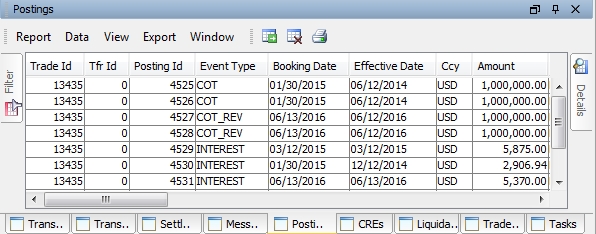
BO Browser (the "Postings" panel shows postings)
You can configure the Postings panel using the menu items.
Click here for details on the menu items.
| • | Canceled postings appear with a pink background |
| • | Stock ledger postings appear with a blue background |
You can select a posting to view its details in the Details window.
You can right-click a posting and show additional information.
9. Viewing CREs
Load a trade or a trade bundle, and select the "CREs" panel. It displays the account enrichment events that have been generated by the CRE engine prided the environment property SHOWCRE=true.
Refer to Calypso CREs documentation for information on generating CREs.
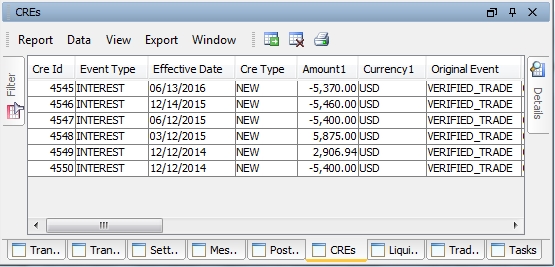
BO Browser (the "CREs" panel shows account enrichment events)
You can configure the CREs panel using the menu items.
Click here for details on the menu items.
You can select a CRE to view its details in the Details window.
You can right-click a CRE and show additional information.
10. Viewing Liquidations
Load a trade or a trade bundle, and select the "Liquidation" panel. It displays the liquidations that have been generated by the Liquidation engine.
Refer to Calypso Position Management documentation for information on generating liquidations.
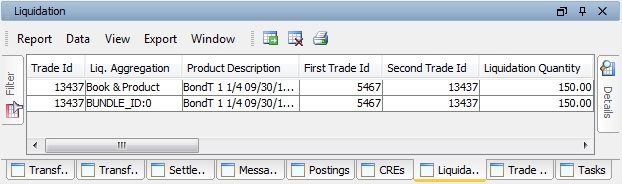
BO Browser (the "Liquidation" panel shows liquidations)
You can configure the Liquidation panel using the menu items.
Click here for details on the menu items.
You can select a Liquidation to view its details in the Details window.
You can right-click a Liquidation and show additional information.
11. Viewing Trade Diary Entries
Load a trade or a trade bundle, and select the "Trade Diary" panel. It displays all the trade diary entries that have been generated by the Diary engine.
Refer to Calypso Trade Diary documentation for information on generating trade diary entries.
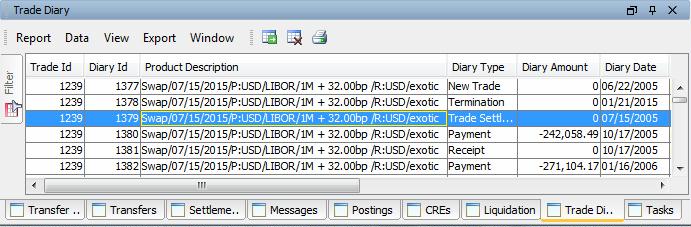
BO Browser (the "Trade Diary" panel shows trade diary entries)
You can configure the Trade Diary panel using the menu items.
Click here for details on the menu items.
You can select a trade diary entry view its details in the Details window.
12. Viewing Tasks
Load a trade or a trade bundle, and select the "Tasks" panel. It displays all the workflow tasks that have been generated on the trade or associated messages and transfers, based on the workflow configuration.
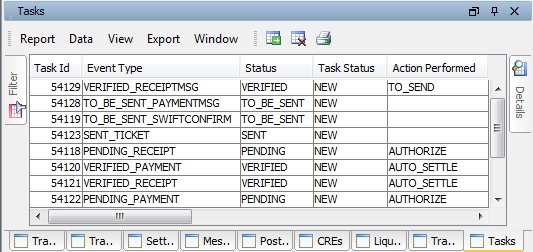
BO Browser (the "Tasks" panel shows workflow tasks)
You can configure the Tasks panel using the menu items.
Click here for details on the menu items.
You can select a Task to view its details in the Details window.
You can right-click a Task and show additional information.