Configuring Profiles
Prior to capturing any trade, you need to define profiles - A profile drives the strategies of a user.
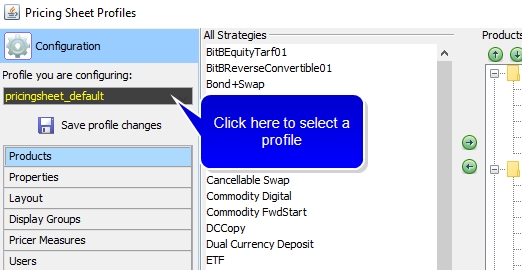
Choose Configuration > Profile Configuration to configure profiles, it brings up the Pricing Sheet Profiles window.
A default profile is available. It contains default configuration for all strategies provided out-of-the-box: pricingsheet_default.
It cannot be modified but it can be saved as a new profile if you want to modify it.
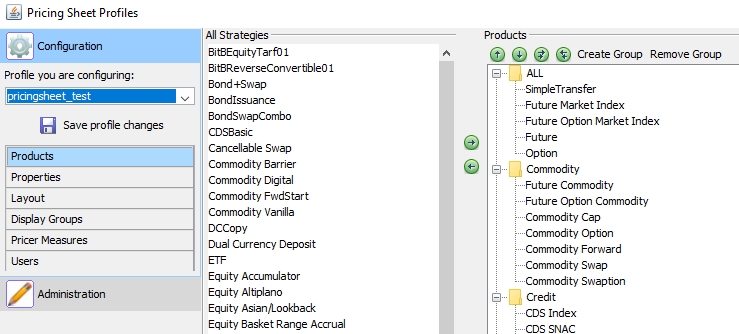
Pricing Sheet Profiles window
The Pricing Sheet Profiles window contains 2 tabs:
| • | The Configuration tab to configure profiles: strategies and users. |
| • | The Administration tab to create profiles, and copy profiles configurations and strategies. |
The panels are described below.
Contents
1. Profile Configuration
Once you have created a profile in the Administration tab, you can configure the profile in the Configuration tab.
Pricing Sheet Profiles window - Profile Configuration
| » | Select a profile and go through the various configuration panels: Properties, Menu, Layout, Display Groups and Users - The panels are described below. |
| » | Then click Save profile changes to save the profile configuration. |
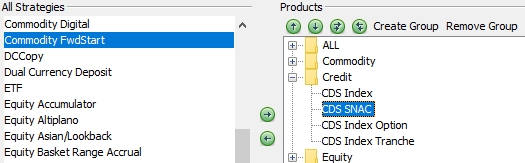
1.1 Products
Select the Products panel to determine which strategies this profile can use.
Profile Configuration - Products panel
To add a strategy to a group, select a strategy from the "All Strategies" column, and select a group from the "Products" column, and click ![]() to make it available for selection within that group. Repeat as needed for other strategies.
to make it available for selection within that group. Repeat as needed for other strategies.
To remove a strategy from a group, select the strategy from the Products column, and click ![]() .
.
Once a strategy is in the Products column, you can sort the strategy by clicking ![]() or
or ![]() .
.
To create a group, click Create Group. You will be prompted to give it a name. Then, move strategies to that group from the "All Strategies" column as described above.
You can indent or outdent groups and strategies using the ![]() and
and ![]() arrows.
arrows.
To remove a group, click Remove Group.
1.2 Properties
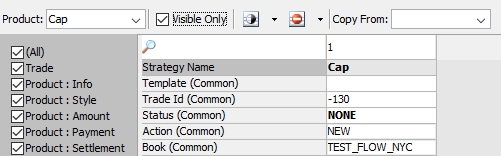
Select the Properties panel to select the properties that will be displayed for each strategy.
Profile Configuration - Properties panel
All properties can be made visible under "Common". This will make them visible for all strategies that use these properties.
The left-most panel can be used to filter the properties that appear in the right panel. Uncheck the property categories that you wish to hide.
You can also make properties visible and editable per strategy.
This also applies to custom strategies.
Search
You can click any cell in the defined properties to search existing properties.
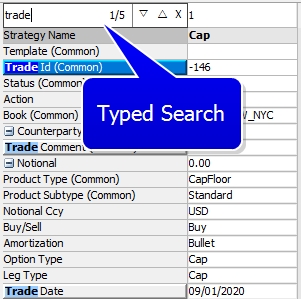
Red text denotes "no match" for properties. If a match is found, the window jumps to the location.
Visible / Invisible
To make properties visible, select a strategy or "Common", select one or multiple properties and choose ![]() > Make Visible. The visible properties will appear in the pricing sheet for the corresponding strategies.
> Make Visible. The visible properties will appear in the pricing sheet for the corresponding strategies.
 See Strategy Properties for a complete description of all properties.
Visible properties appear in black, and non visible properties appear in gray. "(Common)" next to a property indicates that this property has been made visible under "Common".
Attempting to make properties visible that are not relevant to any of the chosen products in a given profile will result in a warning message listing those properties. Those properties will not be visible in the pricing sheet, even though they are visible in the profile configuration view.
Filter
You can click Filter to display only certain categories of properties: Trade properties, Product properties, Date properties, Market Data properties, etc.
You can add pricer parameters to the Pricing Sheet and make them visible/editable. Pricer parameters are displayed using the "Pricer Params" checkbox on the filter drop down. If a parameter is not available, add it to the "PricingSheetPricerParams" domain.
You can check the "Visible Only" checkbox to view only visible properties.
Editable / Not Editable
For each strategy, you can also make the properties not editable by choosing ![]() > Make uneditable. They are editable by default. They will appear with a gray background if they are not editable. You can always make them editable again if needed.
> Make uneditable. They are editable by default. They will appear with a gray background if they are not editable. You can always make them editable again if needed.
Copy From:
The "Copy From:" drop down enables a user to copy configured properties from out of the box defined strategies to custom strategies. To use this function:
| » | Select a strategy from the "Custom" folder in the strategy drop down. |
| » | Click the drop down field. |
| » | Select the strategy to copy to the custom strategy. |
Ⓘ [NOTE: Only applicable strategy properties will be available to add to a custom strategy, e.g. a custom Swap strategy will only display out of the box Swap strategy properties]
1.3 Layout Panel
Select the Layout panel to define the look and feel of the properties.

Profile Configuration - Layout panel
TIP: To quickly locate a specific property, highlight any row and begin typing the property name. The highlighted row moves to the first property that matches the entered text.
You can set the following parameters:
| • | Order - You can move the properties using the up and down arrows, or by dragging and dropping. You can select multiple properties and move them together. |
| • | Display Name - Enter a free form name. If value exists in this column, name will be displayed in the Pricing Sheet using this profile. If no name exists, the profile will use the default name. |
| • | Auto Expand - For properties that have show a "+" next to them in the pricing sheet (sometimes referred to as parent groups), checking Auto Expand will cause their child properties to display by default. |
| • | Display Group - You can group multiple properties into a display group and then either show or hide groups of properties in strategy legs. Upon trade capture, you can choose which groups of properties you want to display by clicking |
To set a display group, select one or multiple properties, and select a display group. You can add groups to the domain "PricingSheetPropertyDisplayGroups".
| • | Color - Select one or multiple properties, and double-click the color bar to pick a color for the property's background. |
| – | You can set the color to apply to the Property Name, Trade Legs, or Both by using the dropdown next to the color dropdown. |
1.4 Display Groups Panel
A user can configure custom icon buttons for a toolbar configuration. Display Groups can also be Configured in User Preferences.
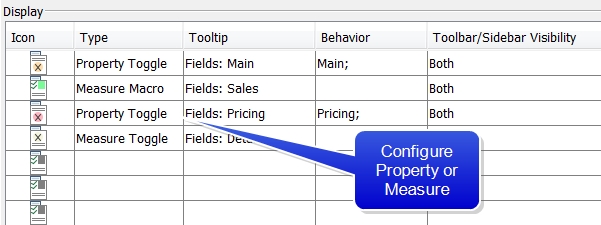
Configure window (Display Panel)
Step 1 - Configure an icon. A user can configure the color of the icon by double clicking and selecting a color from a chooser pallet.
Step 2 - Select Measure or Property for the type of icon. A Toggle icon allows you to automatically turn behaviors on or off by clicking the button, while a Macro icon will show a pop up where you can select the behaviors that you wish to display.
Step 3 - Enter a free-form Tooltip message that will pop out when a cursor hovers over the icon.
Step 4 - Select the behavior attached to the icon. Double-clicking in the row field will enable a selection box.
If choosing Measure from the Type column, Default, Base, Specific, FX2, Favorite, Detailed Data selection checkboxes will be displayed.
If choosing Property from the Type column, None, Detailed Data, Detail 1, Detail 2, Detail 3, Entity, Market Data, Pricer Data, Reference and Solver selection checkboxes will be displayed.
Step 5 - Click Save profile changes when you are done.
1.5 Pricer Measures
Select the Pricer Measures panel to select which pricer measures you want to display.
Ⓘ [NOTE: Only the pricer measures defined in domain "PricingSheetMeasures" are available for selection - You can add pricer measures to that domain as needed.
Ⓘ The following pricer measures are not supported in the Pricing Sheet: CA_NOTIONAL, CA_QUANTITY, CA_PV, CA_COST]
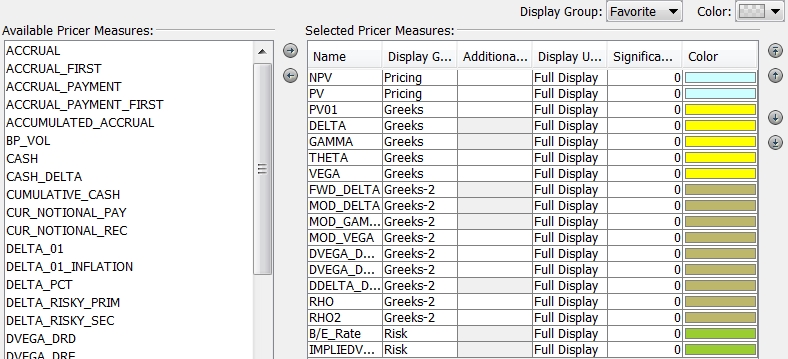
Configure window (Pricer Measures panel)
Step 1 - Select a pricer measure from the left-hand side, and click ![]() to make it available for computing.
to make it available for computing.
Step 2 - Set the following parameters as applicable:
| • | "Display Group" - You can group multiple pricer measures together into a display group and then either show or hide the group of measures in strategy legs. Choose which groups of pricer measures you want to display by clicking |
You can add display groups to the domain "PricingSheetPricerMeasureDisplayGroups" as needed.
| • | "Additional Currencies" - By default, the pricer measures are computed based on the risky currency defined in the currency pair - However, you can select additional currencies in which you want to compute the pricer measures. |
| • | "Display Units" - Set to display the value precision in the selected measure. Set to "Full Display", "Integers", "K (thousands)", "M (millions)", "B (billions)". |
| • | "Significant Figures" - Set number of digits displayed by the measure. |
| • | "Color" - Double-click the color bar to pick a color for the pricer measure's background. |
Step 3 - Click Apply when you are done.
Summing Pricer Measures Across Asset Classes
To allow pricer measures to be summed across asset classes, add them to the domain “PricingSheetMeasures.CrossAssetSummable”.
FX Spot Delta
The pricer measure “FX Spot Delta” is only available in the pricing sheet.
It shows the total amount of FX Delta needed to Spot Hedge (Delta Hedge as of Spot Date) the trade. This is potentially different from the DELTA pricer measure because of the effect of any FX Delta incurred by the fees.
1.6 Users Panel
Select the Users panel to determine which users have access to this profile.
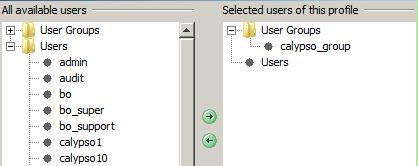
Profile Configuration - Users panel
Select one or multiple users or user groups from the left-hand side, and click ![]() to allow those users to have access to this profile.
to allow those users to have access to this profile.
2. Profile Administration
Click the Administration tab to create profiles, and copy profiles configurations and strategies.
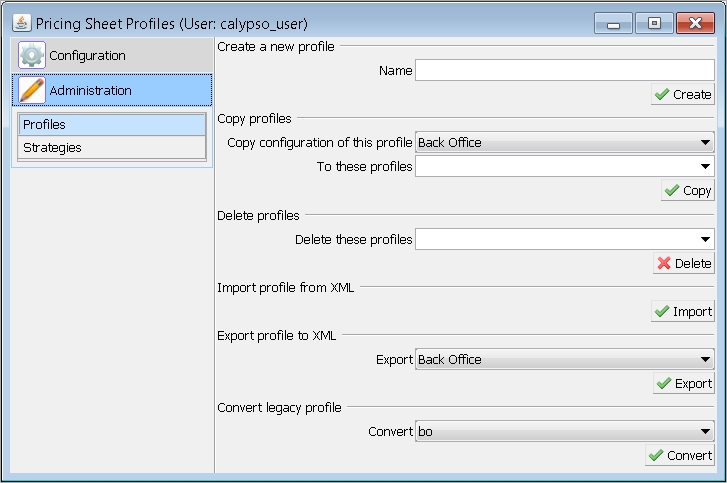
Pricing Sheet Profiles window - Profile Administration
2.1 Profiles Panel
Creating a Profile
To create a profile, enter a profile name in the "Create a new profile" area, and click Create.
Ⓘ [NOTE: After adding a new profile, make sure the appropriate user(s) or user group(s) is added for profile access. Once the user is given access to the new profile, the profile is made available for selection in the Active Profile list (Configuration > Active Profile). See Users Panel above for details]
Copying Profile Configurations
You can use this function when you create a new profile to copy the configuration from an existing profile. You can then adjust the configuration as needed.
Select a source profile and a list of target profiles in the "Copy profiles" area, and click Copy.
Deleting Profiles
Select a list of profiles from the "Delete profiles" area, and click Delete.
Exporting Profiles to XML
Select a profile and click Export. You will be prompted to enter a file name.
An XML file containing the selected profile will be created. You can import this profile in another environment.
Importing Profiles from XML
Click Import. You will be prompted to select an XML file that contains a profile that you have exported.
Converting legacy profiles
Ⓘ [NOTE: This step is highly recommended if users have upgraded to v13 SP2 Pricing Sheet from any older version]
Creating or modifying a profile in a Calypso version older than v13 SP2 requires a user to convert the file using this function. Click Convert after selecting a profile from a drop down to convert it.
2.2 Strategies Panel
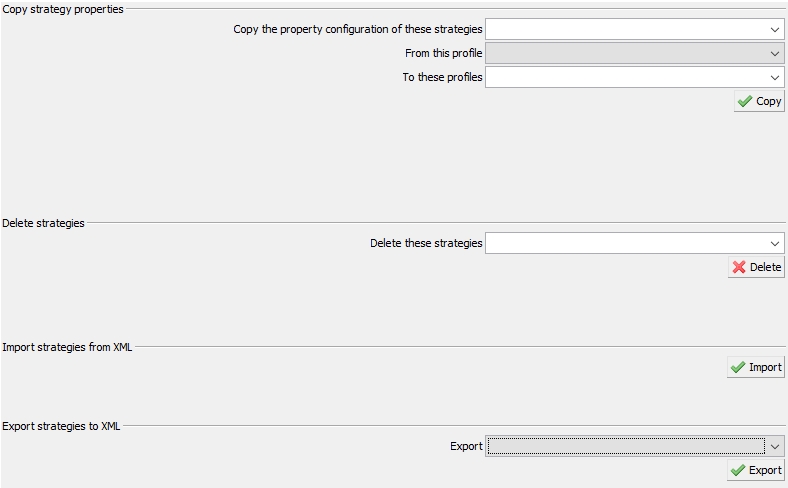
Profile Administration - Profiles panel
Copying Strategies
You can use this function when you want to copy strategies from one profile to a set of other profiles.
Select the strategies you want to copy, a source profile and a list of target profiles in the "Copy strategy properties" area, and click Copy.
Deleting Strategies
Select a list of strategies from the "Delete strategies" area, and click Delete.
Exporting Custom Strategies to XML
Select a set of custom strategies and click Export. You will be prompted to enter a file name.
An XML file containing the selected strategies will be created. You can import these custom strategies in another environment.
See Building Custom Strategies for information on creating custom strategies.
Importing Custom Strategies from XML
Click Import. You will be prompted to select an XML file that contains the custom strategies that you have exported.
See Building Custom Strategies for information on creating custom strategies.