Capturing Precious Metal Lease Rate Swap Trades
Choose Trade > Commodities > Precious Metal Lease Rate Swap to open the Precious Metal Lease Rate Swap worksheet, from Calypso Navigator or from the Calypso Workstation.
[Note: You can capture a vanilla interest rate swap using the Precious Metal Lease Rate Swap worksheet when the settlement currency is the same as the currency in both legs]
|
Precious Metal Lease Rate Swap Quick Reference
When you open a Precious Metal Lease Rate Swap worksheet, the Trade panel is selected by default. Configuration
Entering Trade Details
Or you can enter the trade fields directly. They are described below, see Field Description. Note that the Trade Date is entered in the Details panel.
Saving a Trade
You can also hit F3 to save the current trade as a new trade, or choose Trade > Save As New. A description will appear in the title bar of the trade worksheet, a trade id will be assigned to the trade, and the status of the trade will be modified according to the workflow configuration. Pricing a Trade
Trade Lifecycle
|

 See also -
1. Sample Precious Metal Lease Rate Swap Trade
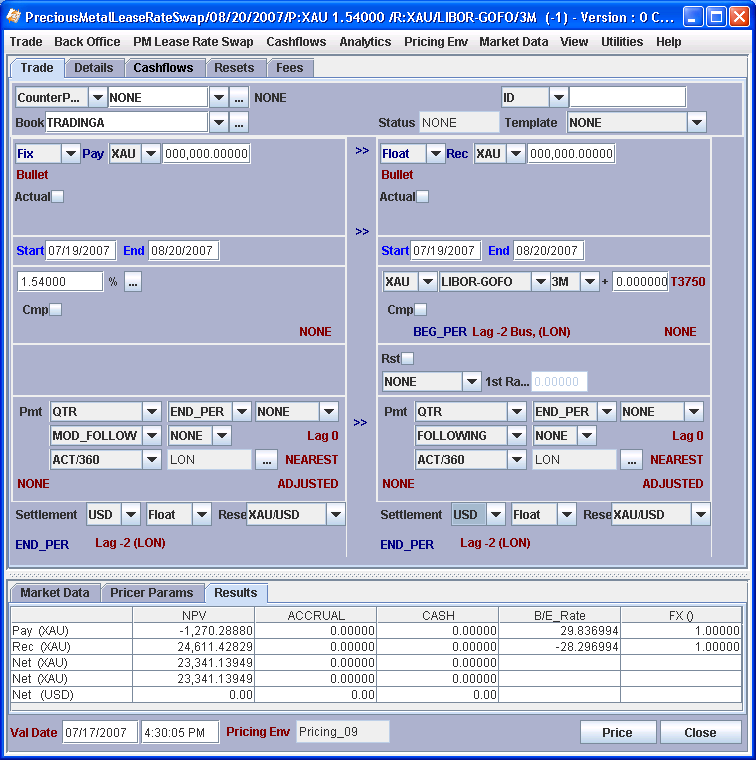
1.1 Field Description
| Fields | Description |
|---|---|
|
Role/Cpty |
The first two fields of the worksheet identify the trade counterparty. The first field identifies the trade counterparty’s role. The default role is specified using Utilities > Set Default Role. However, you can change it as applicable. You can select a legal entity of specified role from the second field provided you have setup favorite counterparties. You can also type in a character to display the favorite counterparties that start with that character. Favorite counterparties are specified using Utilities > Configure Favorite Counterparties. Otherwise, click ... to select a legal entity of specified role from the Legal Entity Chooser. You can also type [Ctrl-F] to invoke the Legal Entity Chooser, or directly enter a Legal Entity short name. |
|
Book |
Trading book to which the trade belongs. Defaults to the book selected in the User Defaults. You can modify as applicable. You can select a book provided you have setup favorite books. Favorite books are specified using Utilities > Configure Favorite Books. Otherwise, click ... to select a book. The owner of the book (a processing organization) identifies your side of the trade. |
|
Id Ext Ref Int Ref |
Unique identification number of the trade. The trade id is automatically assigned by the system when the trade is saved. You can load an existing trade by typing the trade id into this field, and pressing [Enter]. You can also display the internal reference of external reference. The default trade reference to be displayed can be selected in the User Defaults. The internal reference and external reference can be set in the Details panel of the trade worksheet. |
|
Status |
Current status of the trade. The status is automatically assigned by the system based on the workflow configuration. The status will change over the lifetime of the trade according to the workflow configuration and the actions performed on the trade. |
|
Broker |
Displays the broker if a broker fee is captured in the Fees panel. |
|
Template |
You can select a template from the Template field to populate the worksheet with default values. Then modify the fields as applicable. |
PM Lease Rate Swap Details
You can begin by entering the trade details in either the left or right panel. Note that as you enter each value, the application copies it to the other leg if applicable. There are three direction signs in the middle of the worksheet. Double-click the signs to toggle between:
| • | >> Copy to the right panel. |
| • | << Copy to the left panel. |
| • | --- Turn off copying. |
| Fields | Description | |||||||||
|---|---|---|---|---|---|---|---|---|---|---|
|
Fix/Float |
Select Fix to define a fixed leg, or Float to define a floating leg. For details on defining a fixed leg, see Fixed Leg below. For details on defining a floating leg, see Floating Leg below. |
|||||||||
|
Pay/Receive |
Direction of the trade from the book’s perspective.
Double-click the Pay or Rec label to select to pay or receive the fixed rate, depending how the deal is structured. Select the precious metal. Enter the notional in the adjacent field. You can use shortcuts, for example enter “10m” for 10,000,000. |
|||||||||
|
Start/End |
Set the swap start and end dates by entering the dates. The start date defaults to the precious metal spot date.
|

Fixed Leg
| Fields | Description | |||||||||||||||
|---|---|---|---|---|---|---|---|---|---|---|---|---|---|---|---|---|
|
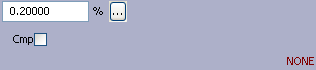
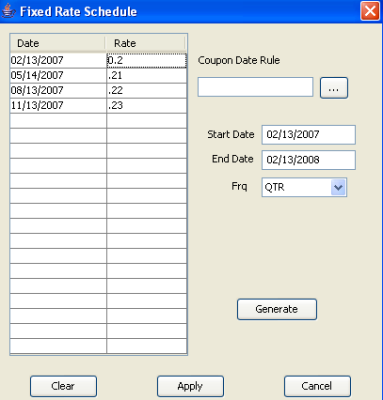
Rate |
Enter the fixed interest rate in percentage. You can enter as many decimal places as needed to get the fixed payments to the desired amount. There is no rounding of the fixed interest rate when calculating the fixed payments. You can also click ... to define a fixed rate schedule.
|
|||||||||||||||
|
Cmp |
Check the Cmp checkbox to enable interest compounding.
- Flat — Flat compounding. - Spread — Does not apply to fixed rates, only to floating rates. - NoCmp — A cashflow is created at the compounding period without actually compounding the interest. There is no compounding otherwise. |
|||||||||||||||
|
NONE (payout formula) |
Double-click the NONE label to associate a payout formula with the trade. It brings up the Payout Formula window. Default is NONE. Out-of-the-box, the RangeFloater formula is available. It allows defining an embedded option. For information on implementing custom payout formulas, refer to the Calypso Developer’s Guide. |

Floating Leg
| Fields | Description | ||||||
|---|---|---|---|---|---|---|---|
|
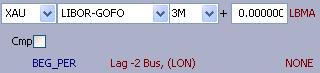
Rst |
Check the Rst checkbox to sample resets at a frequency different from the payment frequency. Otherwise, the resets are sampled at the payment frequency.
Double-click the Equal label to toggle between: - Equal — Resets within the sampling period are equally weighted. - Weighted — Resets are weighted according to the number of days for which they apply. For example, if a reset occurs on a Monday, the weight is 1 day; if it occurs on a Friday, the weight is 3 days (Friday, Saturday and Sunday). - Simple — The reset rate is calculated as the mean rate within the sampling period. - Cutoff Adj. — Calculates weighting up to cutoff date. The cutoff date is set as a number of days from the last sample period’s end date. Double-click any red label to set the cutoff lag in the CutOff Lag field of the Index and Resets panel. Double-click the Match label to toggle between: - Match — Rates are sampled over the entire averaging period. You can double-click the “, , 0” label to define resets’ effective day and a cutoff lag. It brings up the Swap Detail window. You can set reset details in the Index and Resets panel. Help is available from that window. - Custom — Rates are sampled over a user-defined period. Double-click the “0, , 0” label to define the number of days of the sampling period, as well as resets’ effective day and a cutoff lag. It brings up the Swap Detail window. You can set reset details in the Index and Resets panel. Help is available from that window. NOTES: The effective day of the resets only applies to weekly and monthly sampling (weekly: day of the week, monthly: day of the month). |
||||||
|
NONE / 1st Rate |
Select “1st Rate” to set the rate for the first reset period if known.
Otherwise, the rate will be set through the reset process. |


Rate Reset Details
| Fields | Description | ||||||
|---|---|---|---|---|---|---|---|
|
Rst |
Check the Rst checkbox to sample resets at a frequency different from the payment frequency. Otherwise, the resets are sampled at the payment frequency.
Double-click the Equal label to toggle between: - Equal — Resets within the sampling period are equally weighted. - Weighted — Resets are weighted according to the number of days for which they apply. For example, if a reset occurs on a Monday, the weight is 1 day; if it occurs on a Friday, the weight is 3 days (Friday, Saturday and Sunday). - Simple — The reset rate is calculated as the mean rate within the sampling period. - Cutoff Adj. — Calculates weighting up to cutoff date. The cutoff date is set as a number of days from the last sample period’s end date. Double-click any red label to set the cutoff lag in the CutOff Lag field of the Index and Resets panel. Double-click the Match label to toggle between: - Match — Rates are sampled over the entire averaging period. You can double-click the “, , 0” label to define resets’ effective day and a cutoff lag. It brings up the Swap Detail window. You can set reset details in the Index and Resets panel. Help is available from that window. - Custom — Rates are sampled over a user-defined period. Double-click the “0, , 0” label to define the number of days of the sampling period, as well as resets’ effective day and a cutoff lag. It brings up the Swap Detail window. You can set reset details in the Index and Resets panel. Help is available from that window. NOTES: The effective day of the resets only applies to weekly and monthly sampling (weekly: day of the week, monthly: day of the month). |
||||||
|
NONE / 1st Rate |
Select “1st Rate” to set the rate for the first reset period if known.
Otherwise, the rate will be set through the reset process. |
Payment Details
The payment details allow generating the cashflows.
| Fields | Description | ||||||||||||
|---|---|---|---|---|---|---|---|---|---|---|---|---|---|
|
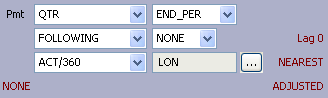
Pmt |
Select the payment frequency. You can also select a date rule to determine the payment dates and the interest dates. Double-click the “Lag 0” label. It brings up the Swap Detail window. You can select payment and coupon date rules in the Date Rules panel. Help is available from that window. |
||||||||||||
|
END_PER/BEG_PER |
Double-click the END_PER label to switch to BEG_PER as needed: END_PER indicates that the reset occurs at the end of the reset period. BEG_PER indicates that the reset occurs at the beginning of the reset period. |
||||||||||||
|
Date Roll |
Select the date roll convention to roll the payment dates when they fall on business days. The payment calendar is used to determine business days. Date roll conventions are described by choosing Help > Date Roll Conventions from Calypso Navigator. |
||||||||||||
|
Roll Date |
Select a date roll adjustment.
|
||||||||||||
|
Lag |
Double-click the Lag label to define the lag between the actual reset date and the beginning or end of the reset period. It brings up the Swap Detail window. You can set lag details in the Index and Resets panel. Help is available from that window. |
||||||||||||
|
Daycount |
Select the day count convention to determine the number of days in the payment periods. For a description of daycount conventions, from Calypso Navigator choose Help > Day-Count Conventions. |
||||||||||||
|
Payment Calendar |
Click ... to select payment calendars. They are used to determine business days. |
||||||||||||
|
NEAREST (rounding method) |
Double-click the NEAREST label to define the rounding method. It brings up the Swap Detail window. You can set rounding details in the Rounding panel. Help is available from that window. |
||||||||||||
|
NONE (stub periods) |
Double-click the NONE label to define stub periods It brings up the Swap Detail window. You can set stub details in the Stub Periods panel. Help is available from that window. | ||||||||||||
|
ADJUSTED (accrual period) |
Double-click the ADJUSTED label to define how the accrual period is adjusted on non-business days. It brings up the Swap Detail window. You can set accrual details in the Amortization and Accrual panel. Help is available from that window. |
Settlement Details
The settlement details may be defined independently for each leg.
When the settlement currency is different than the currency of the leg, you can enter a fixed rate, or select an FX reset for a floating rate.
When the settlement currency is the same as the currency of both legs, you can capture a vanilla interest rate swap. The application assumes you are capturing a fixed rate of 1, and prices the trade accordingly.
| Fields | Description |
|---|---|
|
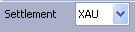
Settlement |
Fixed cash flows in precious metal currency are discounted using the discount curve of the precious metal currency; floating cash flows in precious metal currency are projected using the forecast curve of the precious metal currency and discounted using the discount curve of the precious metal currency; once the FX rate for a flow has been fixed, both fixed and floating flows are converted to the settlement currency and discounted using the discount curve of the settlement currency. Fixed Rate Select the settlement currency, Fixed, and enter the fixed rate.
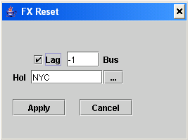
Floating Rate Select the settlement currency, Float, and the FX Rate Definition to fix rates between the precious metal currency and the settlement currency.
You can double-click the Lag label to override lag information.
By default, the floating rate is fixed at the end of the swap period. You can fix the rate at the beginning of the period; double-click the END_PER label to toggle to BEG_PER.
You can enter the rate for the first period in the trade screen by checking the 1st FX Rate box.
Vanilla Interest Rate Swap Leave the settlement currency selected as the same currency in both legs. The application assumes the rate is fixed and 1.
|


 Click here for more information on the business background of precious metals.