External Trades
![]() Download PDF - External Trades
Download PDF - External Trades
External Trades allow modeling and importing trades from an external system for back office purposes. Once the trades are defined and captured, you can import the cashflows using the Data Uploader, and the system allows generating confirmations and transfers.
There is no reset support. There is no Risk or Pricing computation. Valuation can be done using P&L marks.
You can configure and capture External Trades using the External Trade window (menu action trading.TradeExternalTradeWindow).
|
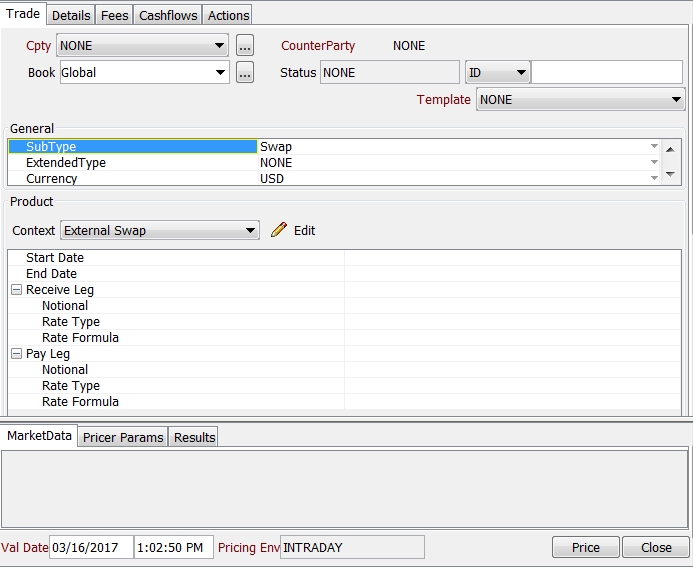
External Trades Quick Reference When you open an External Trade window, the Trade tab is selected by default.
Configuring an External Trade Prior to capturing external trades, you need to configure the fields that make up a given external trade by defining a context. Entering Trade Details
Or you can enter the trade fields directly. They are described below. Note that the Trade Date is entered in the Details panel.
Saving a Trade
You can also hit F3 to save the current trade as a new trade, or choose Trade > Save As New. A description will appear in the title bar of the trade worksheet, a trade id will be assigned to the trade, and the status of the trade will be modified according to the workflow configuration. Pricing a Trade
Trade Lifecycle You can define trade lifecycle actions from the Actions tab. |
1. Trade Tab
1.1 Configuring External Trades
The Context window allows you to define fields that make up a given external trade. You can create as many types of external trades as you like by defining a Context.
Click Edit in the Product area to define a Context.
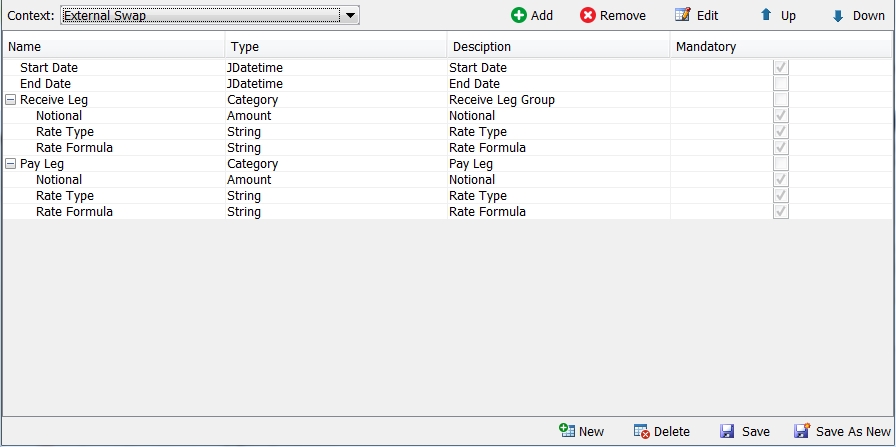
| » | Click Add to open the Field Editor window. The fields are described below. |
| » | Repeat as needed for other fields. |
| » | Use the Up and Down arrows to move the fields. |
| » | Click Save to save any changes made to this Context. |
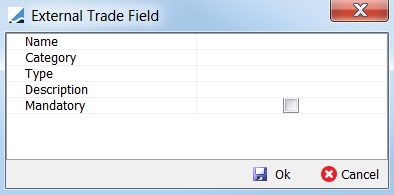
Field Editor
Click Add to open the Field Editor Window and create a new Context Field with the following characteristics:
| • | Name |
| • | Category |
| • | Type |
| • | Description |
| • | Mandatory Flag |
| » | Enter a Name for the Field, such as "Start Date". |
| » | Select a Category as needed. Categories allow grouping during trade capture. See below for information on creating a Category. |
| » | Select a Type for the Field from the drop down list. For an appropriate "Start Date" Field, select "JDate" or "JDateTime". |
Domain Value: You can enter the name of the domain that contains the available values.
Image: You can link to an image. The following formats are supported:
| – | A URL format, such as https://www.calypso.com/images/logo.gif |
| – | A format starting with file:/// such as file:///C:\Downloads\logo.gif |
| – | A notation pointing to Calypso resources starting with resource: such as resource:com/calypso/templates/logo.gif |
| – | A notation pointing to an image stored in the Database (using the Image Repository window) starting with database: and the name of the file (e.g. database:signature). |
List: (Multi-valued Field). The data type should be set in the List object type field.
Matrix: Multiple values can be displayed as a matrix. When selected, you should define:
| – | The number of columns in Number of Object Type |
| – | The data type of each column |
| » | Enter a Description of the Field. |
| » | Check the box to decide if this should be a Mandatory Field or an optional Field. |
| » | Click Ok to save the new Context Field, or click Cancel to cancel the creation of a new Context Field. |
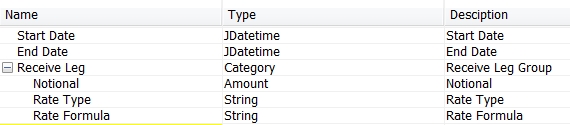
Creating a Category

To create a Category:
| » | Select the "Category" Type. |
| » | Name the Category. |
| » | Click Ok to save this Category. |
You can then add fields to that Category as described above.
1.2 Capturing Trades
Trade Details
| Fields | Description |
|---|---|
| Role/Cpty. |
The first two fields of the worksheet identify the trade counterparty. The first field identifies the trade counterparty’s role. The default role is specified using Utilities > Set Default Role. However, you can change it as applicable. You can select a legal entity of specified role from the second field provided you have setup favorite counterparties. You can also type in a character to display the favorite counterparties that start with that character. Favorite counterparties are specified using Utilities > Configure Favorite Counterparties. Otherwise, click ... to select a legal entity of specified role from the Legal Entity Chooser. You can also type [Ctrl-F] to invoke the Legal Entity Chooser, or directly enter a Legal Entity short name. |
| Book |
Trading book to which the trade belongs. Defaults to the book selected in the User Defaults. You can modify as applicable. You can select a book provided you have setup favorite books. Favorite books are specified using Utilities > Configure Favorite Books. Otherwise, click ... to select a book. The owner of the book (a processing organization) identifies your side of the trade. |
|
Id Ext Ref Int Ref |
Unique identification number of the trade. The trade id is automatically assigned by the system when the trade is saved. You can also display the internal reference of external reference. The default trade reference can be selected in the User Defaults. You can load an existing trade by typing the trade id into this field, and pressing [Enter]. The underlying trades are assigned a sub id. |
| Status |
Current status of the trade. The status is automatically assigned by the system based on the workflow configuration. The status will change over the lifetime of the trade according to the workflow configuration and the actions performed on the trade. |
| Template |
You can select a template from the Template field to populate the worksheet with default values. Then modify the fields as applicable. You can select a template provided you have setup favorite templates. Favorite templates are specified using Utilities> Configure Favorite Templates. |
General Panel: Trade Characteristics
The Trade characteristics are input through a dedicated panel called "General".
The panel contains three fields:
|
Fields |
Description |
|---|---|
| SubType |
Select a SubType as needed. SubTypes can be defined in the domain "ExternalTrade.subtype". You can set pricers and market data by SubType. By default, the Product Type for External Trades is ExternalTrade. When setting the SubType, the Product Type is set to "ExternalTrade<SubType>". For example, if SubType = Swap, Product Type = ExternalTradeSwap. |
| ExtendedType |
Select an ExtendedType as needed. ExtendedType can be defined in the domain "ExternalTrade.extendedtype". You can set pricers and market data by ExtendedType. |
| Currency | Select the trade currency. |
Product Panel: Product Characteristics
Select a context from the Context field, and enter the fields corresponding to the selected context. The fields depend on what you have configured in the Context window.
You can then save the trade and proceed to the other panels as applicable.
2. Capturing Cashflows
You can enter cashflows manually or import cashflows using the Data Uploader.
 Please refer to Calypso Data Uploader documentation for information on importing External Trade cashflows.
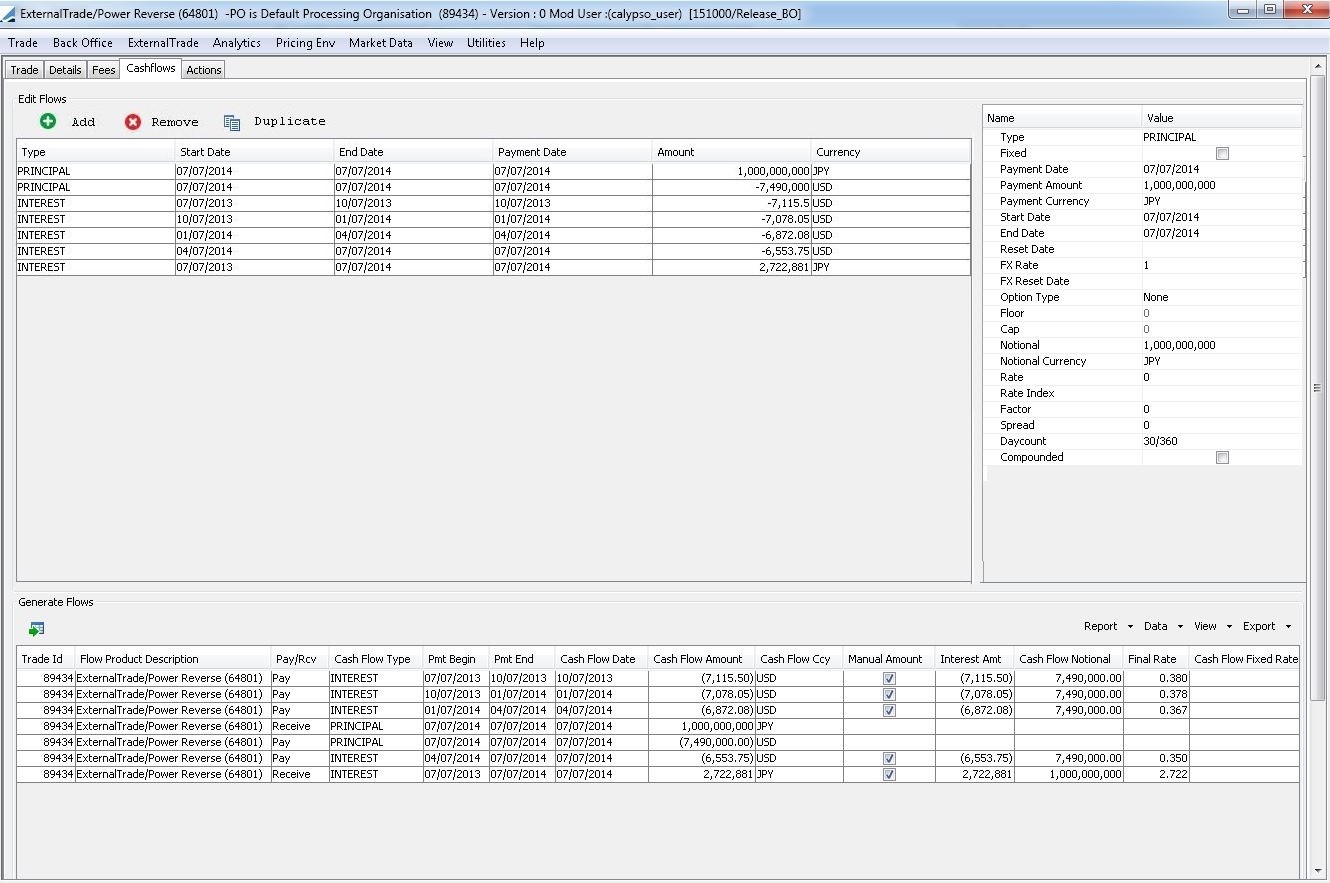
2.1 Edit Flows Panel
The Edit Flows panel shows the entered / imported trade flows:
| • | Type |
| • | Start Date |
| • | End Date |
| • | Payment Date |
| • | Amount |
| • | Currency |
When a row is highlighted in the panel, the trade flow details will be displayed in the Input panel on the right.
The rows are sorted by ascending Payment Date and Type (PRINCIPAL, then INTEREST, COMMODITY, DIVIDEND, PRICE_CHANGE).
| » | Click Add to create a new row with the following values: |
| – | Type = INTEREST |
| – | Payment Date = Current Date |
| – | Payment Currency = Trade Currency |
| – | Payment Amount = 0 |
| » | Edit these values in the Input panel. |
| » | You can click Duplicate to clone the selected row with the following changes only: |
| – | Start Date = duplicated Cash Flow End Date if set. |
| – | End Date = Start + number of Days between duplicated Cash Flow End Date and Start Date if set. |
| – | Payment Date = duplicated End Date if set; otherwise, duplicated Cash Flow Payment Date. |
2.2 Input Panel
The Input panel is used to set the values of the trade flows.
| » | Select a flow type from the drop down list, which will determine the other values below. |
| » | Enter in all remaining values. You will be notified if there is a required value that you have not entered. |
| » | Your changes will automatically update in the Edit Flows panel. |
| » | Click  to generate the standard Cash Flows based on the input trade flows. to generate the standard Cash Flows based on the input trade flows. |
3. Defining Actions
You can define the following actions for External Trades:
| • | Notional Increase |
| • | Rerate |
| • | Reprice |
| • | Termination |
| • | Novation |
These actions are for informational purposes only.
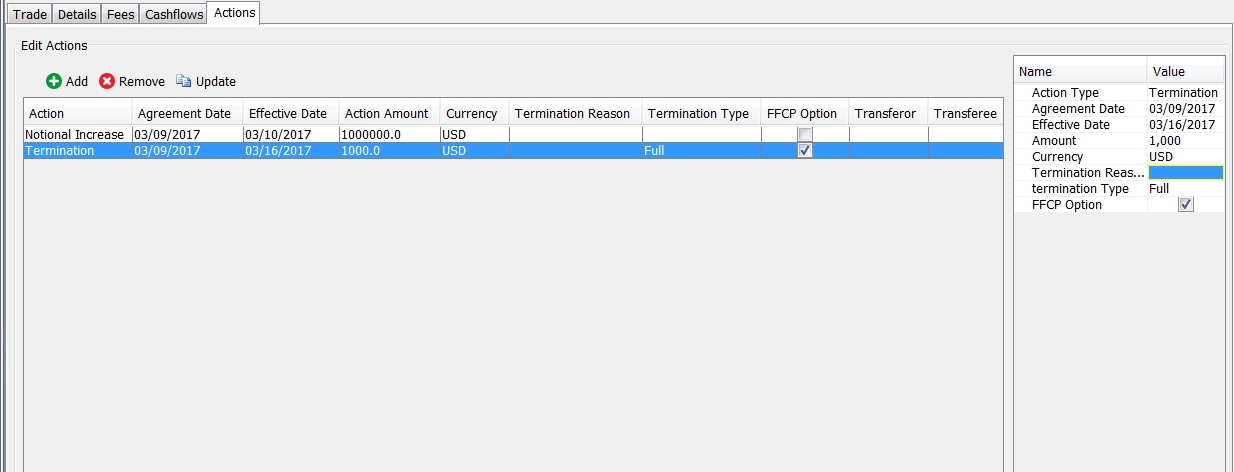
3.1 Edit Actions Panel
The Edit Actions panel shows all the actions that have been applied to the trade.
| » | Click on Remove to remove the selected Action from the list. |
| » | Click on an Action to edit its values in the Input panel on the right. |
| » | Click on Update to update the list to reflect any values you have changed in the Input panel. |
3.2 Input Panel
Use the Input panel to enter in all details of Actions you wish to create.
| » | Select an Action Type from the drop down list, which will determine the other available values below. |
| » | Enter in all remaining values. You will be notified if there is a required value that you have not entered. |
| » | Click on Add to add this new Action to the list in the Edit Actions panel. |
Notional Increase
You can increase the notional amount using the Notional Increase action.
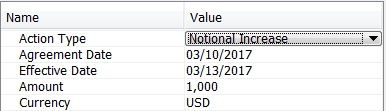
| » | Enter the amount of notional in the Amount field. |
Rerate
You can change the rate of the trade using the Rerate action.
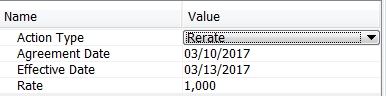
| » | Enter the new rate in the Amount field. |
Reprice
You can change the price of the trade using the Reprice action.
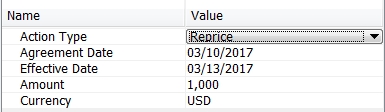
| » | Enter the new price in the Amount field. |
Termination
You can terminate the trade using the Termination action.
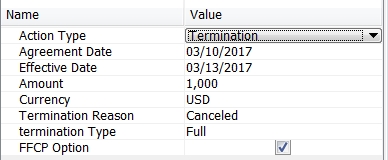
| » | Enter the termination amount, termination reason, select the termination type (full or partial), and select the FFCP option as needed (Full First Calculation Period. Used in the case of partial termination to determine the Xfer Trade Date and Pmt Begin Date on the first cashflow of the new trade). |
Novation
You can novate the trade using the Novation action.
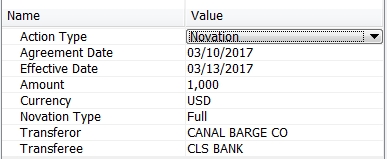
| » | Enter the novation amount, and select the novation type (full or partial), the transferor (the party that terminates the trade), and the transferee (the new party). |
4. Trade Processing
4.1 Workflow
Two specific TradeRules can be used for External Trades:
| • | CheckMandatoryFields: Checks if all Product Properties set as Mandatory have been filled. If not, an Exception is raised. |
NB: for manual input, a Trade Validator is implemented preventing the Trades with empty Mandatory Fields to be saved.
| • | CheckCustomFlows: Checks if Trade Flows have been set on the Trade. If not, an Exception is raised. |
Below is a Workflow example:
|
Orig Status |
Action |
Result Status |
Create Task |
Use STP |
Rules |
|
VERIFIED |
CANCEL |
CANCELED |
On Failure |
FALSE |
|
|
PENDING_CF |
AUTH_NO_CF |
VERIFIED |
On Failure |
FALSE |
|
|
PENDING_CF |
AMEND |
PENDING |
On Failure |
FALSE |
|
|
PENDING |
EXECUTE |
PENDING_CF |
On Failure |
TRUE |
|
|
PENDING_CF |
CHECK_FLOWS |
TO_CHECK |
On Failure |
TRUE |
CheckCustomFlows |
|
NONE |
NEW |
PENDING |
On Failure |
FALSE |
|
|
TO_CHECK |
AUTHORIZE |
VERIFIED |
On Failure |
FALSE |
CheckSDI |
|
VERIFIED |
AMEND |
PENDING |
On Failure |
FALSE |
|
|
PENDING_CF |
SET_FLOWS |
PENDING_CF |
On Failure |
FALSE |
|
|
TO_CHECK |
AUTHORIZE_STP |
VERIFIED |
On Failure |
TRUE |
CheckMandatoryFields, CheckSDI |
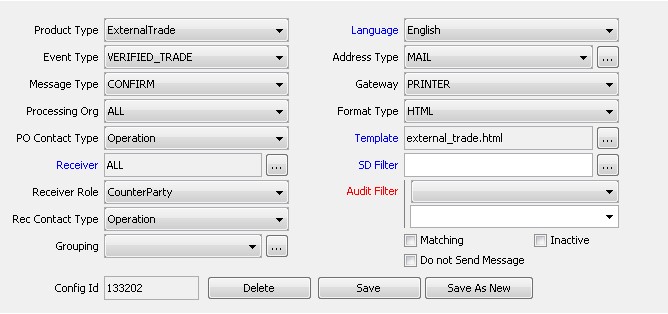
4.2 Messaging
Message Setup
A dedicated Template external_trade.html has been created for External Trades and can be used in the Message Setup.
Message Keywords
The following specific Message Keywords can be used to build your own Templates:
| • | "Iterator ExternalTradeField": Display all Trade Properties. |
| • | "REPORT#Context [Context Name].[Field Name]": Display one specific Trade Property. |
| • | "REPORT#Context [Context Name].[Category Name]:[Field Name]": Display one specific Trade Property Category. |
| • | "Iterator ExternalTradeAction": Display all Actions. |
| • | "LatestExternalTradeAction": Display the LATEST Action. |
4.3 Valuation
External Trades rely on PricerFromDB to retrieve the Pricer Measures imported from external systems.
The usage of PLMarks (pricing parameter USE_MARKS=True) is recommended.
4.4 Accounting
The following Accounting Events are supported for External Trades.
Trade Based Events
|
Accounting Event |
Description |
Booking Date |
Effective Date |
Amount |
|
NOM_TD |
To book the notional on Trade Date |
Entered Date |
Trade Date |
Notional |
|
NOM_TD_REV |
To book the reverse of notional on Start Date |
Entered Date |
Start Date |
Notional |
|
NOM_SD |
To book the notional on Start Date |
Entered Date |
Start Date |
Notional |
|
NOM_MAT |
To book the notional at maturity |
Entered Date |
Maturity Date |
Notional |
|
NOM_CHG |
To book the notional change (Increase + Decrease) |
Entered Date |
Notional change amount Date (from CF) |
Notional change amount. |
|
INTEREST |
To book Interest amounts |
Entered Date |
Payment Date (from CF) |
Interest Flow Amount |
|
DIVIDEND |
To book Dividend amount |
Entered Date |
Payment date (from CF) |
Dividend Flow amount |
|
COMMODITY |
To book Commodity amount |
Entered Date |
Payment date (from CF) |
Commodity Flow amount |
|
PRINCIPAL |
To book Principal amount |
Entered Date |
Payment date (from CF) |
Principal Flow amount |
|
PRICE_FIXING |
To book Price Change amount |
Entered Date |
Payment date (from CF) |
Price Change Flow amount |
|
FULL_COUPON |
To book Coupon amount |
Entered Date |
Payment date (from CF) |
Coupon amount |
Transfers Based Events
|
Accounting Event |
Description |
Booking Date |
Effective Date |
Amount |
|
CST |
To book actual cash payments |
Entered Date |
Settle Date |
Real settlement amount |
|
CST_NET |
To book actual cash payments (Netted Transfers with NET Event Property) |
Entered Date |
Settle Date |
Real settlement amount |
|
CST_UNNET |
To book actual cash payments (Netted Transfers with UNNET Event Property) |
Entered Date |
Settle Date |
Real settlement amount |
Valuation Related Events
|
Accounting Event |
Description |
Booking Date |
Effective Date |
Amount |
|
DAILY_VALUATION |
To book daily Pricer Measures |
Entered Date |
Valuation Date |
Pricer measure amounts One Event per PM |
|
MTM_FULL MTM_PAYLEG MTM_RECLEG |
To book NPV-related Pricer Measures |
Entered Date |
Valuation Date |
Pricer measure amounts One Event per PM |
|
ACCRUAL ACCRUAL_PAYLEG ACCRUAL_RECLEG |
To book ACCRUAL-related pricer measures |
Entered Date |
Valuation Date |
Pricer measure amounts One Event per PM |
4.5 Report
All Contexts and Product Properties are available in Reports under Product \ ExternalTrade.
