Defining Holiday Calendars
Holiday calendars are used throughout the system for determining business days. They can be attached to currencies, legal entities, products, user defaults, etc.
From the Calypso Navigator, navigate to Configuration > Definitions > Holiday Calendars (menu action refdata.HolidayFrame)
for defining holiday calendars.
| • | A holiday calendar is identified by its code throughout the system. |
1. Creating a Holiday Calendar
Select the Codes label and click New.
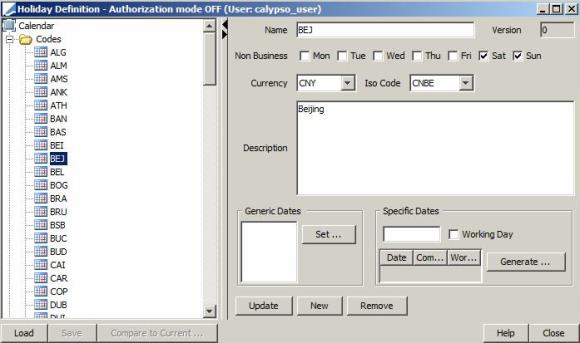
| » | Enter the fields described below, and click Add. |
| » | You can click Compare to Current to display any modification. |
| » | Click Save to save your changes. |
Note that if the Authorization mode is enabled, an authorized user must approve your entry.
Fields Details
|
Fields |
Description |
||||||
|---|---|---|---|---|---|---|---|
|
Name |
The name identifies the calendar throughout the system. |
||||||
|
Non Business Days |
Check the boxes corresponding to the non-business days of the week. Sat and Sun are checked by default. |
||||||
|
Currency |
Select the default currency associated with the calendar. |
||||||
|
Iso Code |
Select the ISO code as needed. Calendar ISO codes are stored in the domain calendarIsoCodes. The calendar ISO code will populate tag22B of the generated swift message based on the holiday calendar set on the trade’s currency. |
||||||
|
Description |
Enter a user-defined comment if desired. |
||||||
|
Generic Dates |
Click Set to select rules that define recurring non-business days. Rules are defined in the Rules panel.
Once the rules are selected, you need to generate the actual non-business days that apply to this calendar. Click Generate to generate the non-business days corresponding to the selected rules.
You can paste in specific dates defined in an Excel spreadsheet by right-clicking and choosing “Paste from Clipboard”. The dates are added to the specific dates. The generated holiday calendar can be viewed from Utilities > Calendar. |
||||||
|
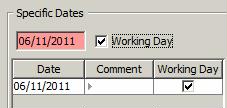
Specific Dates |
Adding Specific Dates as Holidays Enter a date that is a non-business day. When you hit [Enter], the date is added to the specific dates. You can specify a comment.
Adding Working Days You can add working days that are exceptions to a rule. For example, you have selected all Saturdays to be holidays but a specific Saturday is a working day. You can add it here. Enter a date that is a working day and check the "Working Day" checkbox. When you hit [Enter], the date is added to the specific dates. You can specify a comment. |
 See
See 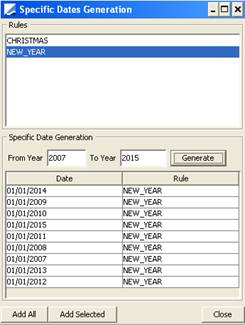
Sample Usage
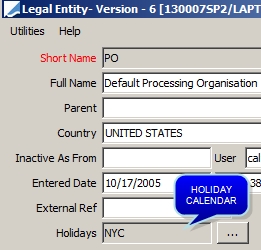
Sample Legal Entity definition
2. Defining Holiday Rules
Select the Rules label, and click New.
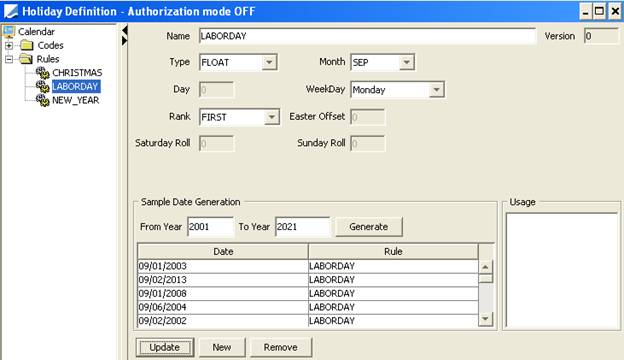
| » | Enter a name and select a type, and enter the fields described below based on the selected type. Then click Add. |
| » | You can click Compare to Current to display any modification. |
| » | Click Save to save your changes. |
Note that if the Authorization mode is enabled, an authorized user must approve your entry.
| » | You can enter years in the fields From Year and To Year fields and click Generate to test the dates generated by the rule. |
| » | The Usage area shows the holiday calendars that use the selected rule. |
EASTER
The EASTER type allows determining Easter Sunday.
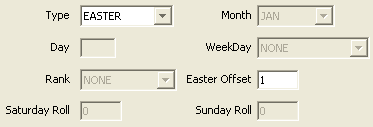
| » | Enter the offset that represents the number of days after Easter for the actual holiday (usually 1 day, as the holiday is on Monday). |
FIXED
Select FIXED to setup a holiday that occurs on a fixed date.
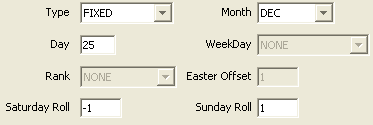
| » | Enter the fields described below as applicable. |
|
Fields |
Description |
|---|---|
|
Month |
Month of holiday. |
| Day |
Day of holiday. |
| Saturday Roll |
Enter a positive or negative number of rolling days when the holiday falls on a Saturday. For example, you can set it to -1 so that if the holiday falls on a Saturday, it will roll to Friday. |
| Sunday Roll |
Enter a positive or negative number of rolling days when the holiday falls on a Sunday. For example, you can set it to 1 so that if the holiday falls on a Sunday, it will roll to Monday. |
FLOAT
Select FLOAT to define a holiday that occurs on a floating date, such as the last Monday of August.
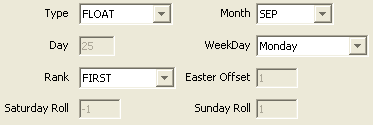
| » | Enter the fields described below as applicable. |
| Fields | Descriptionn |
|---|---|
|
Month |
Select the month of the holiday. |
|
WeekDay |
Select the day of the holiday in the week. |
|
Rank |
Select the rank of the day in the month (NONE, FIRST, SECOND, THIRD, FOURTH, LAST). |
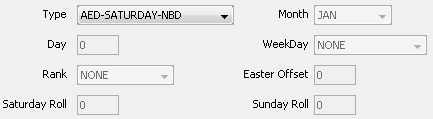
AED-SATURDAY-NBD
The rule type “AED-SATURDAY-NBD” counts Saturdays as a holiday as of May 29, 2015. This type is used for AED EIBOR fixings.
3. Modifying a Holiday Calendar or a Holiday Rule
Ⓘ [NOTE: If you modify a holiday calendar, it will impact the whole system]
| » | Select a calendar under the Codes label, or a rule under the Rules and make changes as applicable. Then click Update. |
| » | You can click Compare to Current to display any modification. |
| » | Click Save to save your changes. |
Note that if the Authorization mode is enabled, an authorized user must approve your entry.
When a calendar is modified, the exception EX_HOLIDAYS_CHANGES is generated.
You can apply the action “ReProcess Transfers” to this exception – It brings up the Process Trades window with all the trades impacted by this change. You can select the trades from there and have the Transfer engine reprocess the corresponding transfers.
You can also use "Investigate > Show Trade Diary" to view the impacted trades before processing the exception.
Ⓘ [IMPORTANT NOTE: The “ReProcess Transfers” action looks for impacted trades in the Trade Diary, therefore this functionality only works if the Diary engine is running – Also, the “ReProcess Transfers” action only modifies future transfers, with respect to Today - If you modify a calendar that impacts past transfers, they will not be reprocessed]
4. Deleting a Holiday Calendar or a Holiday Rule
Ⓘ [NOTE: If you delete a holiday calendar, it will impact the whole system]
| » | Select a calendar under the Codes label, or a rule under the Rules and click Remove. |
| » | You can click Compare to Current to display any modification. |
| » | Click Save to save your changes. |
Note that if the Authorization mode is enabled, an authorized user must approve your entry.
5. Displaying Pending Modifications
| » | Click Pending Modifs to display any pending modification. |
This only applies if the Authorization mode is enabled.