Defining Countries
From the Calypso Navigator, navigate to Configuration > Definitions > Countries (menu action refdata.CountryWindow)
to define countries.
Countries are mostly used when creating legal entities.
_1040x313.jpg)
Country window
| » | All existing countries are loaded by default. |
You can filter the list of countries using the Filter tab, as needed.
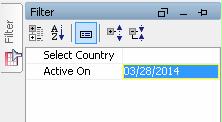
You can select a list of countries and/or enter an active date.
You can click ![]() to configure the column display.
to configure the column display.
| » | Countries are identified by their name throughout the system. |
| » | You can specify user-defined attributes for selection and reporting purposes. |
| » | You can export / import countries to XML files using the XML menu. |
1. Creating a Country
| » | Click  to create a
new country. You will be prompted to select an ISO code. to create a
new country. You will be prompted to select an ISO code. |
Only the ISO codes specified in the Java locale are available for selection.
To add an ISO code which is not in the Java locale, you can add it to the domain “additionalCountryISOCode”.
| » | Then click the  panel and enter information
into the fields as applicable. The fields are described below. panel and enter information
into the fields as applicable. The fields are described below. |
| » | Click  to save
your changes. to save
your changes. |
Note that if the Authorization mode is enabled, an authorized user must approve your entry.
Fields Details
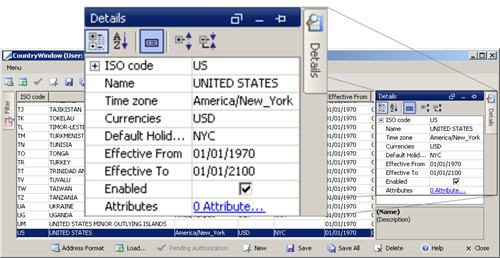
Details panel
|
Fields |
Description |
|---|---|
|
ISO Code |
The ISO code is associated with a country when you create it. |
|
Name |
Enter the name that will identify the country throughout the system. |
| Time zone | Select a time zone from the drop-down box. |
|
Currencies |
Select currencies from the drop-down box. |
|
Default Holidays |
Select holiday calendars from the drop-down box. |
|
Effective From Effective To |
Enter active dates to cover the timeframe of the project. |
|
Enabled |
Check / uncheck to enable / disable the country. This setting is only used in conjunction with the CheckValidCountry transfer rule and CheckValidCountry message rule to prevent payments from being authorized when the country of the counterparty’s agent is disabled, or to prevent messages being sent when the country of the receiver is disabled. This rule can be placed on the transition PENDING - AUTHORIZE - VERIFIED in the transfer workflow. This rule can be placed on the transition PENDING - AUTHORIZE - TO_BE_SENT in the message workflow. |
| Attributes |
Click Attributes to define country attributes.
|
 See
See
Sample Usage
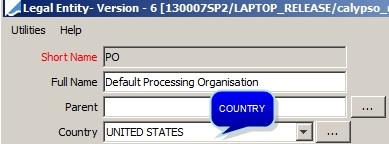
Sample legal entity
2. Modifying a Country
| » | Select a country from the list, then click Details from the right-hand side. |
Make changes as applicable.
| » | Click Save to save your changes. |
Note that if the Authorization mode is enabled, an authorized user must approve your entry.
Ⓘ [NOTE: If you modify a country, it will impact currencies, legal entities and related data, and products]
3. Deleting a Country
| » | Select a country from the list, then click Delete. |
Note that if the Authorization mode is enabled, an authorized user must approve your entry.
Ⓘ [NOTE: If you delete a country, it will impact currencies, legal entities and related data, and products]
4. Defining Country Attributes
Country attributes can be used for selection and reporting purposes.
| » | Select a country from the list, then click the Attributes field. The Attributes Window will appear. |
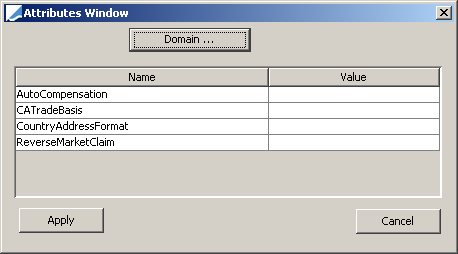
Sample country attributes
Click Domain to add or delete attributes.
Then click Save to save your changes.
| » | Then double-click the Value cells to set values for the corresponding attributes. |
Click Apply.
Ⓘ [NOTE: If you want to specify a list of possible values for a given attribute, create the domain “CountryAttributes.<attribute name>”, and add the values to that domain - the name is case sensitive]
5. Defining an Address Format
The address format is used in Swift messages.
| » | Select a country from the list, then click Address Format. The Mail Address Formatter dialog will appear. |
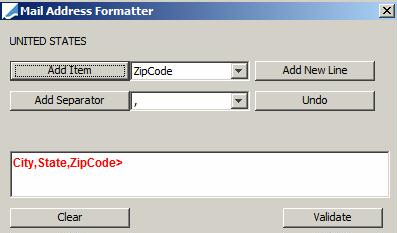
Sample address format
Select items and click Add Item as needed.
You can add separators between the items. Select a separator and click Add Separator.
Then click Validate to save the address format.
| » | Then click Save in the Country window to save your changes. |
6. Displaying Pending Authorizations
| » | Select a country from the list, then click Pending Authorization to display any country pending authorization. This only applies if the Authorization mode is enabled. |