Exotic Note Definition
An Exotic Note is a position based product with a pricing script as the only payoff.
1. Defining an Exotic Note
To define an Exotic Note, from Calypso Navigator choose Configuration > Equity > Exotic Note (menu action product.BondExoticNoteWindow).
1.1 Loading an existing Exotic Note
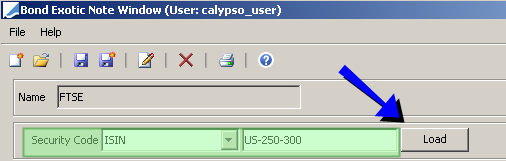
You can load an existing Exotic Note in the window using one of the following methods:
| » | Select a security code type from the Security Code list and enter the actual code value in the adjacent field. |
Then click Load to load the corresponding Bond Exotic Note.
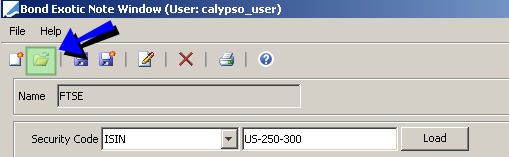
| » | You can also click  near the top of the window to open the Product Chooser Window. Help is available from that window. near the top of the window to open the Product Chooser Window. Help is available from that window. |
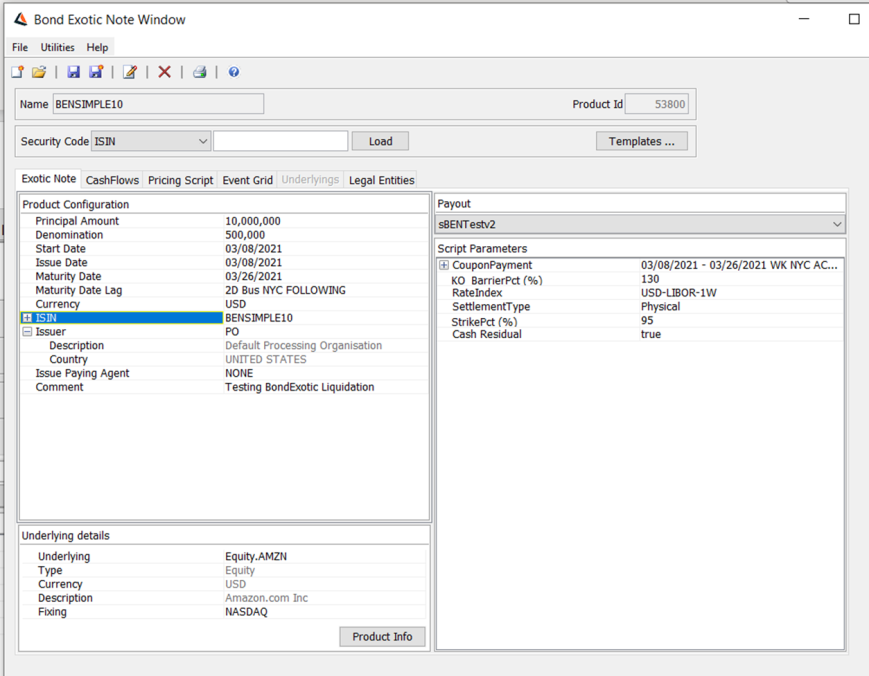
1.2 Creating a new Exotic Note
| » | Click  and enter values in the fields. The fields are described below. and enter values in the fields. The fields are described below. |
1.3 Modifying an Exotic Note's Name
| » | Click  to rename the Exotic Note. You will be prompted to enter a new name. to rename the Exotic Note. You will be prompted to enter a new name. |
1.4 Saving an Exotic Note
| » | Click  to save your changes. You can click to save your changes. You can click  to save as new. to save as new. |
Definition Fields Details
| Field | Description |
|---|---|
|
Name |
Name of the Exotic Note specified upon saving. |
|
Product Id |
Unique ID given by the system when the Exotic Note is saved. |
|
Principal Amount |
Enter the total amount of the note. Principal amount must be multiple of note's denomination. |
|
Denomination |
Enter the minimum tradable unit. |
|
Start Date |
Enter the start date. |
|
Issue Date |
Enter the issue date. |
|
Maturity Date |
Enter the date the note matures. |
|
Maturity Date Lag |
You have the option to offset the maturity date. |
|
Currency |
Select the currency of the Bond Exotic Note. |
|
Security Code |
Expand this label to view all the security codes defined. You can enter a value for each security code as applicable. You can create new security codes using Calypso Navigator > Configuration > Product > Code. |
|
Issuer |
Select the issuer, a legal entity of role Issuer. |
|
Comment |
Enter a text comment as applicable. |
|
Underlying |
Click ... and select the underlying from the Product Chooser Window. Upon selection, the underlying type, currency, and description will be displayed. You can click Product Info to view more Product details related to the underlying. Fixing You can select an equity reset as needed. Equity resets are defined in the Equity Definition or Equity Index Definition. If not selected, the default is CLOSE, indicating that the fixing is done using the spot quote. FX Reset For FX underlyings, you can select the FX Reset used to fix prices. |
|
Payout |
Select an available pricing script from the drop-down menu. Specify the script parameters as necessary.
|
2. Generating the Cashflows
Select the CashFlows panel.
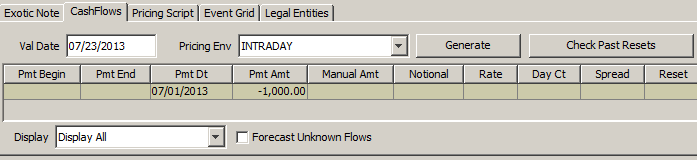
Exotic Note Definition window - Sample cashflows
| » | Select a valuation date from the Val Date field and select a pricing environment from the Pricing Env field. |
| » | Click Generate and the cashflows will be displayed. |
| » | Select the type of cashflows you want to display from the Display field. You can choose to display only interest cashflows, only principal cashflows, or all cashflows. |
| » | You can click Check Past Resets to bring up the Quote Window. |
| » | Right-click any cell to display the Cash Flow Menu. |
Cash Flow Menu Details
| Menu Item | Description |
|---|---|
|
Copy Ctrl-C Paste Ctl-V |
Allows copying and pasting into values. Select a cell, type Ctrl+C, then select another cell and type Ctrl+V. The content of the first cell will be pasted into the second cell. |
|
Add |
Right-click a row and choose Add. The selected row will be split between two rows. The first one will be one day long, and the second one will fit the remaining term of the original period. You can edit the periods as applicable. |
|
Remove |
Right-click a row and choose Remove. The selected row will be removed. |
|
Scheduler |
Only applies to the Notional, Spread, and Rate columns. Open the Scheduler dialog. |
|
Check Resets |
Checks the reset rates. |
|
Configure Columns |
Allows selecting and organizing the displayed columns. |
|
Rename Columns |
Allows customizing the columns names. |
|
Save Configure Columns |
Allows saving the column configuration. |
|
Lock Column |
Right-click a modified value and choose "Lock Column" so the value will not be overridden when the cashflows are generated. A locked column will show a star to the left of the column heading. |
|
Lock All Modified Columns |
Allows locking all columns containing modified values. |
|
Unlock Column |
Right-click a locked column and choose "Unlock Column" to unlock. |
|
Unlock All Columns |
Allows unlocking all locked columns. |
|
Show Paydown Periods |
Right-click a row and choose "Show Paydown Periods" to show any paydown. |
|
Interest History |
Right-click a row and choose "Interest History" to display the Interest History window. |
|
Show External Flows |
External cashflows are defaulted to Calypso-generated cashflows unless they have been imported from Bloomberg. You can paste cashflows copied from an Excel spreadsheet into the external cashflows. External cashflows are only saved once they have been modified. |
|
Recalc |
When cashflows have been customized, choose Recalc to displays the cashflows without overriding unlocked columns. |
|
Generate |
To generate the cashflows. Ⓘ [NOTE: If you have customized the cashflows and not locked the columns containing modified values, you should not choose Generate. Choose Recalc, which will prevent the columns from being overridden] |
|
Export to Excel |
Allows exporting the cashflows to an Excel spreadsheet. |
|
Export to HTML |
Allows exporting the cashflows to an HTML page. |
3. Viewing the Pricing Script
Select the Pricing Script panel to view the Pricing Script definition.
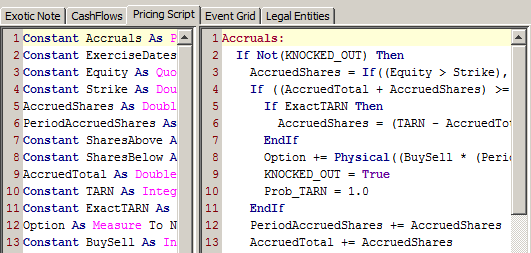
Exotic Note Definition window - Sample Pricing Script
4. Event Grid
Select the Event Grid to display lifecycle events for the Exotic Note. It allows checking that the dates are properly generated.
Note that lifecycle events will only appear if they have been configured for the selected Pricing Script.
 Please refer to Calypso Pricing Script Lifecycle Events documentation for details.
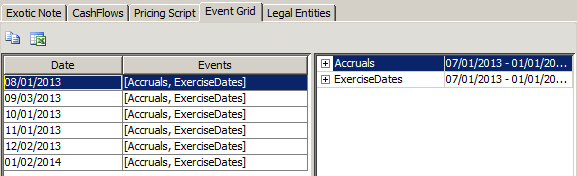
| » | Click  to copy selected cells to the clipboard. to copy selected cells to the clipboard. |
| » | Click  to export the table to Excel. to export the table to Excel. |
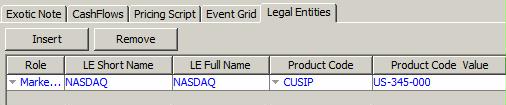
5. Legal Entities
You can select the Legal Entities panel to specify product codes for multiple legal entities.